The topic of the week at Jewelry Studies International was heavy bezels. This was my first class with Vasken Tanielian, who is a Paris-trained master jeweler and CAD/CAM specialist. I aspire to someday incorporate beautiful high end stones into my work, so the idea of learning to construct bezels with precision appealed to me. Over the course of the week we learned mathematical approaches to both straight and tapered wall bezels in three stone shapes: round, oval and square. Only the straight wall bezels were finished in this class, while the tapered bezels are destined for rings in the shanks and bands class next week. I have decided to postpone that class until fall, as I'm falling quite behind on other commitments and I really have to catch up.
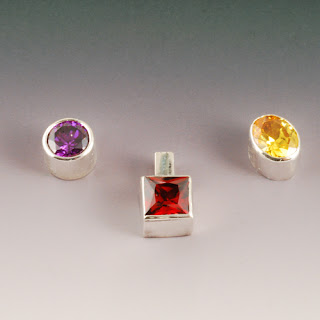 |
| finished heavy bezels in Argentium silver |
We learned a great deal about precision this week. Precise layout was emphasized; cutting and filing were refined; tight controlled fusing and soldering were practiced. We explored the pros and cons of fusing and soldering, with lack of perfect control in fusing sometimes causing shrinkage or deformation, whereas soldering introduces harder areas that will subsequently need to be machined away with more difficulty. We learned to file almost completely through the metal to get crisp folded edges. And I learned that improperly applied force can snap one of those paper thin edges, making my first attempt at the most complex tapered square bezel destined for recycling after my attempt to repair the break with solder was not pretty.
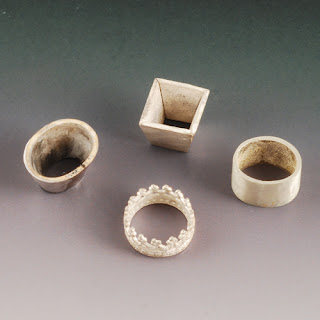 |
| bezel rejects, destined for recycling |
I also split the fused seam on a tapered oval bezel while forming it in the bezel block. After I formed a wedge to insert and fuse to fill the gap, filed and sanded it flush, I proceeded to split it yet again. Another bezel destined for recycling, and a replacement treated more gently with interim annealing. Then there was the delicate gallery wire wrap made to fit the round bezel on the first day, somewhat overheated during fusing, then warped even further during an instructor demo on how to tighten it to fit after matching the pattern perfectly left the ring a tiny bit too large. Another piece of silver destined to be melted down. And I remade the straight wall oval as well, due to filing the bowed outside so much on one side that the wall thickness was noticeably different between the two sides.
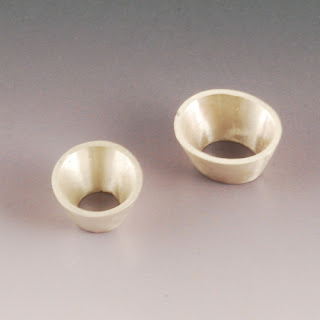 |
tapered bezels, fused Argentium,
for rings in a subsequent class |
We spent hours cutting square and oval seats with a round setting bur, learning to use a graver to cut the sharp corners in the square and trim the edge over the stone, and experimenting with setting stones via punch and hammer or hammer hand piece for the flex shaft.
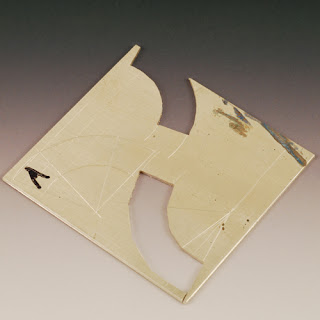 |
| Tapered square bezel layout |
On Friday, although I laid out my tapered square bezel to remake, I decided to work on a new piece of my own. The other bezel can wait until I return for the shanks class next fall. Instead I used a small piece of tubing from last week to make quick and easy tube settings for small stones for a brooch. I'm doing a version of the cloud brooch in Argentium, with only the bird and leaves in metal clay. At the end of the day, we learned some finishing tricks that were invaluable -- how to fix those inevitable deep scratches or pits that show up despite careful handling.


