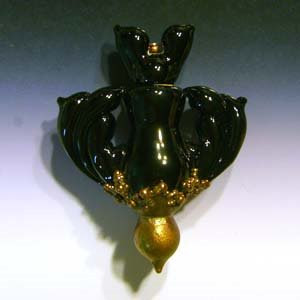
I'm electroforming again, which reminded me of my languishing tutorial.
Last time I mostly gave history and links to beadmakers who use electroforming. Today, I'll start the details.So here's how it works.
Copper is the most commonly electroformed metal; witness all those circuit boards in every electronic device you own. Copper dissolves in an acidic solution to form electrically charged ions, which can be made to move in response to an electric field. (It also dissolves in an alkaline solution, but those usually contain cyanide, which would pose a risk of turning your home into a lethal gas chamber, so skip that!!) By dunking my conductive substrate into a jar of copper solution with a copper source and pushing electricity through the system, I can make copper move from my source (the anodes) to the work (the cathode). See, not so hard, right?
The trick is to push the copper properly. The electricity which comes out of the outlet in your home is alternating current (AC), which means charged particles keep zipping back and forth through the lines, reversing direction 60 times per second (in the US). If I hooked that up to my work, the copper would just move back and forth, and I could never build up a layer where I want it. So I need to change it into direct current (DC) where the charges maintain a net flow in one direction or the other. That's where a rectifier comes in. This is a fancy word for a device that only lets current flow one direction, i.e. it changes AC to DC.
Now, the next problem is voltage. The outlet on your wall supplies 110-120V, which is enough to bubble and fizz your solution -- you'd electrocute the stuff (hopefully not yourself with it). Voltage tells you how big the push on the charges is, and you just need a tiny voltage to move copper, 0.366V to be precise. Your rectifier needs to be able to change the wall voltage into something that small.
Current is the number of charges moving in your circuit. As you might imagine, if I start throwing copper particles at you just as fast as I can go, you will not be able to stack them into a nice neat pile; you'll just toss them yourself, willy nilly. So if you want to make a nice smooth, shiny copper surface, you have to supply copper at a slow rate. The rule of thumb for copper seems to be 0.1 ampere per square inch of surface. By the same token, matching the area of your cathode to that of your anodes makes sense: you need to be able to supply copper at the same rate you deposit it.
Altogether, the key item to acquire is a rectifier that can supply (and measure) currents on the order of a tenth of an amp (or 100 milliamps it might be called) and voltages on the order of tenths of a volt. There are a lot of suppliers out there who can fix you up with a complete electroforming system, or you can shop for a unit that has those characteristics (it's always less expensive to do it yourself). I got mine on e-bay.
Once you have this item, the rest is straight-forward. Next time, I'll list the rest of the required apparatus and how to hook everything up. Stay tuned!
