I've had several people ask for a photography tutorial, so this is the first installment. I certainly don't take the best photos out there, but my images are pretty good for the quick process I use. I have the huge advantage of a husband who has been an avid photography and darkroom hobbiest from youth and loves to buy photography toys.
It's also true that I've made a large investment in photography equipment. As anyone who has investigated professional photography for their work will tell you, it's expensive! One of the reasons is that good equipment is expensive. I've used proceeds from the sales of my work, in particular a large purchase prize for a quilt added to the collection of the Museum of the American Quilters' Society (now the National Quilt Museum) to purchase the early equipment and I've added to it over the years to keep current.
Today, I'll describe the major equipment that I use:
1) Nikon D80 SLR camera body, which is discontinued now (I'd get the D90 probably, if I were shopping now). 
When I used to photograph my huge wall quilts, I had a 35mm film Nikon N50 and then a N80, so this digital 80 was an obvious analog for me to use. I run it in full manual mode, and it has lots more bells and whistles than I know how to use, but a few important things that aren't available on the lower end models (at least not when I was buying).
2) NIKKOR 60mm, f/2.8, macro lens
I've had this since the big quilt days, too, because I needed a lens that could give really crisp, flat images with no distortions. I couldn't get that with the cheap lenses that are often sold with the camera body in a package. I had the experience of projecting slides of 7 foot square quilts and seeing that the edges were out of focus. Then I bought a target poster to look at my lens distortion and sure enough, I had lots of it with the low end lens. This macro lens is incredible; the distortion images were clean; the new ones are probably even better.
It can focus close enough to give a life size image, with incredible depth of field, or give a perfectly flat image of a large target at 15 feet. Unfortunately, it's still a pricey lens. It's a big lens, so the combination of big camera with big lens is really only well suited to the studio unless you're a real photography buff willing to haul it all around.
3) a shooting tent
This white nylon tent diffuses light and controls reflections. When DH came home with the larger model, 30" x 45", I thought it was too big. Now I'm thankful to have it!
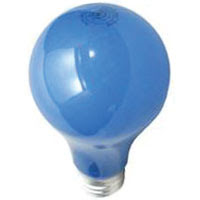
4) 250W blue daylight bulbs in reflectors on adjustable stands

These reflectors and stands date from the quilt days, too. I have four of them to shoot big quilts, but for jewelry and beads I only use a pair. Smaller lights would be an obvious choice for jewelry. I have a new set of flashes that Keenan has bought for me, but I've not gotten them in working order yet. These blue daylight bulbs only last 3 hours each, so a substitute would be nice, but they give nice pictures any time, day or night, sun or storm.
5) a copy stand 
My copy stand is an old enlarger from DH's dark room days, but it looks similar to this. In essence, it consists of a mount for the camera hanging lens downward to focus on a small table. The camera is movable vertically by means of a rack and pinion hand crank. Smaller, lighter weight copy stands are available inexpensively, if you're using a small camera, but my SLR plus lens is big and heavy so I'm happy to have the converted free solution.
That's the big equipment. Next installments will detail how I set up the system and a few nifty accessories that I wouldn't want to do without.
Wednesday, June 17, 2009
Photographing Metal Jewelry and Glass Beads, Part 1
Labels:
photographs


