Showing posts with label kitchen. Show all posts

Monday, October 31, 2011

Refinishing Furniture with Chalk Paint

After a week of work, the buffet finally moved back inside this weekend. I’m happy with how it looks, but not necessarily satisfied that it fits into the new look of the space, which is more contemporary.


Annie Sloan Chalk Paint is interesting. It’s a special paint that can go over anything without primer and is then sealed with wax. The appeal is that it is easy to distress, in that its chalky finish abrades off with sandpaper beautifully and it doesn’t have that plastic texture from latex that peels. I admit to feeling less than enamored with the paint, as it took multiple coats, left lots of brush marks, scratched off easily, and cost a fortune (for paint). However, I do love the wax finish, which gives a very soft, mellow feeling to the entire piece. I even used wax on the top after I stained it darker with Minwax PolyShades “one-step” stain plus polyurethane (five coats! so definitely not one step). The black water ring is undetectable after my bleaching.

I only have the interior shelf left to paint and wax, although I’m contemplating lining the drawers with wallpaper since I have my doubts about how well the interior paint will wear with the daily use of pulling out table linens. So, I should be getting back to metal and glass shortly, but first I have the second Roman shade for over my breakfast table underway.

Thursday, October 27, 2011

Family Room Remodel

Wondering where I've been since I returned from Pennsylvania? I've been putting the family room back together. It's the domino effect! We love the remodeled kitchen, but it made the adjoining room look dowdy. So we decided to finally commit to the built-in bookcases we talked about over 13 years ago when we bought the house.


The finishing touches of the installation were done right before I left town, so I came home to find the sofa in place with the TV and stereo installed by my husband, but all the other belongings still packed away. Important things, you know! Actually he did clean the floors and unroll the rug and bring back in a couple of chairs, since replaced. I've been busy unpacking boxes and scrounging decorative items from elsewhere in the house to stage the built-ins for a photo shoot this morning. The remodeling company is entering photos of the kitchen and matching family room cabinetry into a remodeling magazine competition. Let’s hope Heather takes better photos than I did this morning.


Despite more than a week of furious work, I still have lots to go. My antique oak buffet is half refinished after hours of applying oxalic acid to bleach out the water mark from a leaky houseplant, then more hours staining just the top surface dark, and even more hours applying two coats of Old White chalk paint (all the rage in DIY blog land). I'm almost to the point of distressing the paint to highlight the carved details before waxing the entire thing multiple times. Funny how I thought one of those blogs described this as a fast process. Not for me!

Then there's the window treatments and throw pillows. I have the Roman shade over the kitchen sink made (it's too embarrassing to admit how many measuring/sewing/ripping errors I committed!), and I’m taking a breather before the one over the breakfast table. The kidney pillows for the white chairs are cut (1" too short in one direction, sigh), so waiting my trip to a fabric store to search for trim to extend them. Rolls of fabric, green with arabesque embroidery and cream linen, are standing at attention waiting for me to construct the color block draperies for the family room. I’m so glad I’m saving zillions of dollars by doing this all myself, but I understand why these things are so expensive to hire out.

What do you think of my tuxedo cabinets? The cabinetmaker came out to see them installed and told me he thought I was nuts when he saw the design called for half dark and half white. I wanted to tie into the kitchen, which has a dark island and dark counters, as well as balance the super dark brown leather sofa sitting on the opposite wall. The cabinetmaker now says he likes it, but maybe he was just saying that to please his customer.

I only finally started to unpack my class luggage this morning, when it occurred to me that I left an almost full syringe of silver clay hanging out in there. EEEK! I need to finish the house (this area anyway!), so I'll have some creative energy left to get back to jewelry.

Monday, July 18, 2011

Kitchen Remodel, Complete

This weekend we got to start unpacking the myriad boxes of kitchen supplies. Yesterday we cooked for real at home for the first time in five weeks -- baked potatoes in one oven, apricot cobbler in another and mushroom wine sauce on the cooktop to go over the grilled steaks. Then this morning we had to make breakfast, and I whipped up fish tacos with honey-cumin slaw and chipotle sauce for dinner tonight. What a relief to have real home cooking again!


Here's the view of the finished kitchen, before the mess of unpacking began.


I love the Shaker feet added to the cooktop and sink cabs.


So far my new pantry is more functional than the old corner closet pantry, and the room feels much bigger without that visual wall. The drawers below are better than shelves for bags of pasta and grains. All my baking supplies are now more logically together in the cabinet left of the cooktop.


The Roomba and Scooba robots live with their charging stations hidden below the island.


The trash and recycling bins live together in the trash pullout, while baking dishes pack efficiently on side in the oven drawer.

We have lots more work to do to truly be finished: dividers and organizers inside drawers and cabinets, new window treatments, and - oh, yea - unpacking.

Thursday, July 14, 2011

Kitchen Remodel, Hood & Paint

The remodel is winding down. One to five people have been working steadily all day. This morning the electrical service for the oven was repaired, the hood installation was completed, and the walls and trim were repainted (BM Sherwood Tan = SW Latte).


This afternoon, the hardware installation started and touch-ups for the cabinets are underway. The drawer for under my cooktop arrived, having been completed only once it was certain how much the gas line and cooktop might constrain it, but hasn't been attached yet. The Shaker feet for the sink and cooktop cabinets were put in place.


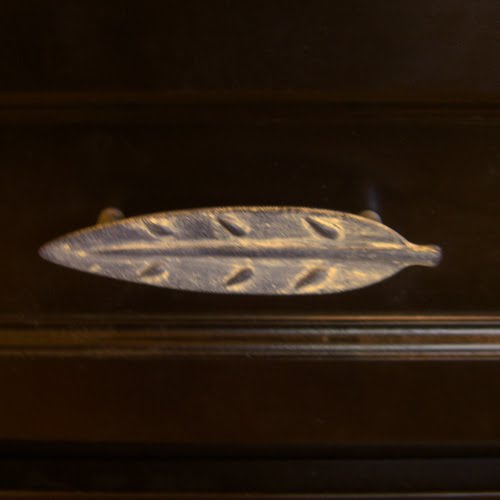
Months ago when I purchased the hardware, I also ordered white Gilder's Paste to apply a cream patina for the island hardware. Despite hours of searching, I never found separate hardware that I liked more than my leaves, so I patinated six pulls today to contrast with the dark wood. We'll see how well it wears. Funny that Gilder's Paste, which I've had in my bag of tricks for two years now, has become all the rage in the metal clay world just recently.


The tile under the hood looks much better with light, which gives shadow and dimension to the 3D basket weave border. I'm amused that the two wildflower tiles I chose to include are Mexican Hat and Turk's Cap.


I'm looking forward to getting back to normal life, complete with cooking and cleaning. I find the continual interruptions of the workmen hard to reconcile with working in the studio. Two weeks from today I'll be at the ISGB Gathering. I'll be bringing some beads to sell at the Bead Bazaar, but right now I'm thinking there won't be a lot to offer. I need to focus for the next two weeks, but first I have to unpack the kitchen!

Monday, July 11, 2011

Kitchen Remodel, Backsplash Begins

The backsplash installation started today. Several years ago (I'm embarrassed to admit I've been holding these that long!), I commissioned a friend to make accent tiles for a new backsplash. I did mount the tiles she made for my fireplace myself (and I even finished the edge on that!), but never got around to the kitchen project. So when I started designing the kitchen, the tile was a driving force in decisions about colors and surfaces.


This Texas wildflower focal point was hand carved by Melodie Greider of Stickhorse Studios for over my old 30" cooktop. Since I changed to a larger 36" cooktop, I had to add a border to make the work more substantial.


I have another 13-14 of the large diamond tiles that will go somewhere else. Originally I planned to space them out on the perimeter, replacing the original green tiles. Now I think that approach seems dated and would detract from the focal point.

I am debating putting one on either side of the sink window bumpout, but can't decide whether that is a distraction as well. I'll need to make that decision by tomorrow morning, when the tile layer returns to finish off the installation. The tile over the cooktop will go all the way to the ceiling, and then the glass canopy Miele ventilation hood will hang over that, with lots of light to make the special tile pop. The grout lines will make the seams less obvious, not to mention the ever-so-attractive spacers will depart. I also feel relieved that the paint I tried on the wall seems to be perfect.

The focal rectangle took a lot of laying out and plotting to get just right, whereas the staggered 4" x 4" on either side just flew onto the wall. Funny how I tried several other possible layouts to use more of the larger tiles, but finally returned to the original plan. How to waste a weekend mocking up backsplashes in Photoshop!

Saturday, July 09, 2011

Kitchen Remodel, Appliances

Well, I only thought all the big items would be complete this week. Another week coming, for certain.


On Thursday afternoon, the new installer stared in disbelief at the joke of an installation by the first contractor. I wish I had a photo of his face -- it was priceless! The inept appliance guy with "forty years of experience" had bent tabs never meant to bend. He also reversed the mounting brackets, which oddly enough meant the oven wouldn't just slide in easily, so he forced it, further bending the brackets. Even so, the side trim just wouldn't go on.

No worries! The new guy took it all apart (forcing the oven back out), flattened everything and mounted it properly, in 15 minutes. The first guy spent over an hour, with an assistant, to do it wrong.


Another hour saw the second oven and cooktop installed and the markings for the hood on the wall. The oven breaker is still off until all the setup is run through, but the cooktop is functional at this point.


The plumber hooked up the new faucet, soap dispenser and disposal air swich in the evening. With running water, it feels like a kitchen again! The new counterdepth, French door refrigerator was delivered on Friday morning, with no issues.

The tile man showed up near Friday lunch time after a delay in the previous job, and we discussed layout for over an hour before he unloaded his tools and the tile. The eight boxes of tumbled travertine 4" x 4" tiles look nothing like my three samples. I describe them as moldy swiss cheese. The stone is extremely porous, to the point of one tile that I pulled out having a hole the size of a quarter in the center. This is the nature of natural stone, I'm told -- it varies. Some of the tiles were very dark as well, which distressed me less than the texture, since I have travertine accent tiles with high density and crisp edges. Refined travertine meet rustic travertine -- now go home.

So I spent my afternoon searching for better travertine tiles, finally finding a helpful warehouse guy who let me sort through a full pallet of Mexican tiles to find the ones with the sharpest edges. This stone varies a lot less in color, as well. Monday we'll try that tile thing again.

Meanwhile, I've been exploring paint, since the wall color was too close to the cabinet color.

Thursday, July 07, 2011

Kitchen Remodel, Lights and Faucet

Now in the fourth week of work, the kitchen remodel end is in sight. Yesterday the island was bolted to the floor, the electrical outlets in the island were installed, and the pendants over the island were hung. Three holes were drilled behind the sink for faucet, soap dispenser and air switch, waiting for the plumber to hook them up this evening.


Moldings are going in over the fridge wall cabinets, but there has been a tiny hitch there. The counter top on one side is 1/2" lower than the other side, due to tile on one side but not the other. This led to a gap at the ceiling, but that side is being raised today to solve the problem.


Appliance installation started on Tuesday, but the installer seemed totally unfamiliar with the Miele appliances we selected. After having to demand that he move the dishwasher back so that it didn't extend two inches past the granite and watching as he tried unsuccessfully to put the trim kit on the speed oven in the corner, we pulled the plug. A different installer that we had spoken with back at the beginning of this adventure, who doesn't need to read the cryptic German installation diagrams because he has done it before, is coming this afternoon to continue. With such a large investment in equipment, we don't want to have something installed incorrectly to void warranties. I particularly don't want to see my glass hood crashing off the wall.

Appliances this afternoon. Plumbing tonight. Refrigerator delivery in the morning. Backsplash installation tomorrow. All the big things should be done this week.

Saturday, July 02, 2011

Kitchen Remodel, Counter Tops

While I was away for the week, work on the kitchen continued without me. Photos via e-mail kept me up-to-date, but even so I walked straight to the kitchen last night to view the progress for myself.


Even before I left, the partial floor tiles were chipped out and replaced. Tape marked the new tiles to remind us not to step on them until the mastic was dry. The puck lights in the glass uppers were also installed, as well as part of the crown molding.


The sink was set into place, with a small issue due to the fact that the apron is 9" tall while the sink itself is 10" deep, and the cabinet was made for the deeper measurement. This was addressed with an insert of granite into the gap. The sink itself is flush mounted with the granite counter top, a rather fussy and delicate operation done on site that was probably best missed.


The Brown Antique granite is absolutely gorgeous in contrast with the creamy cabinets. Along with the espresso stained island, it nicely relieves that huge expanse of white. Although the granite reads as black from a distance, there is lots of action on close view, but hard to photograph.

with flash

no flash
The prize of the kitchen so far is the Calacutta Oro marble on the island, which returned after an excursion to rectify originally reversed Shaker legs (rather odd looking, I must say).


Overall, I've made selections of materials for the kitchen to blend with the overall look, but this stone was the one thing I went home after seeing and said I had to have, even though it was expensive. After all, it's only a small island, and luckily it was a half slab. The veining was perfect to run across the diagonal. I can hardly wait to roll out pastry.


The marble is more cream than white and the veining is quite brown rather than the gray I had seen in most stone yards. Finally I understand the Oro in the name, as this piece has flecks of metal (both gold and silver) in it that sparkle on close inspection.

Undercabinet lights are also installed, as well as the pendant over the sink. Despite the admonition that I might have enough lights for an operating room, I am still looking forward to two more pendants to brighten up the place. All appliances but the fridge were delivered to our garage while I was gone, and we purchased the new counterdepth French door refrigerator this morning during the Independence Day sale for the lowest price we've seen since we've been looking. Next week: backsplash, grout, moldings, lights, paint, cabinet hardware, faucets, disposal, appliances.

Wednesday, June 22, 2011

Kitchen Remodel, New Cabinets

They're here! After days of an empty kitchen, it felt so odd to see the big tall towers coming in and eating up the space. I thought my kitchen was feeling very small for a while there. Tipping the refrigerator surround up into place was quite a feat of maneuvering. I somehow expected all the cabinets to come in smaller sections, but they are custom built to super tight tolerances and some of the runs were long and heavy.


The color is a bit creamier than I anticipated. It's so hard to tell what paint will look like in big doses, even though I painted a two foot square board as a sample. It will be beautiful with the Brown Antique granite and espresso island, coming later, but I definitely need to tweak the wall color.


The missing floor tile is where the island used to be, since we had the previous cheap engineered hardwood replaced with tile when it became worn and discolored after about 5 years. There are other missing tiles around the perimeter as well. Some of the cabinets were cut on the spot to work around that, and tiles will be replaced on Friday.


Now the room looks somehow larger, perhaps because the cabinets go all the way to the ceiling. Tomorrow the puck lights in the top glass cabinets will be wired and the crown moldings and toe-kicks will be added.

We've only found a couple of mistakes. I had requested that the insides of the glass cabinets be painted, but they were left with the clear-UV-coat birch showing. That was a choice that I was on the fence about, so evidently the powers that be thought there was enough white (it was less work, for certain). What do you think? Beyond that, the apron of my stainless steel farm sink is only 9" high, whereas the sink itself is 10" deep. The sink cabinet was made for the larger depth, so it needs to be modified. Obviously, we should have asked for more detailed drawings. It's fairly straightforward to change the rail on the front, but I also asked about the possibility to add a piece of granite or espresso maple trim underneath as a drip rail. Just another reinforcement that mistakes are opportunities.

Monday, June 20, 2011

Kitchen Remodel, Cabinets Moved to the Garage

Over the weekend, we tackled the dreaded garage clean out in order to install a subset of the old kitchen cabinets out there in the bump out. Keenan pulled everything out of the space into the middle of the garage floor, then we took down the shelf along the top of the wall which was covered with boxes untouched for a decade. Finally we maneuvered the cabinets into place, screwed them to wall studs, and headed out to buy countertops. For convenience, we purchased two smaller lengths of premade formica countertop, then ripped them to size with the circular saw. First check: the saw and saw horses get to stay.


The gray organizer drawer sets that I purchased for my studio before I found the white ones have been waiting patiently for this day, when we dumped all the old scrambled drawers and toolboxes and reorganized everything. Now we actually have drawers dedicated to washers and wood screws and hose gaskets. Labels needed.

Brutally culling equipment that we've stashed in case we might someday use it, we took a small SUV completely loaded with give-aways to Goodwill: stunt bike, scooter, scroll saw, power painter, coolers, canning pot, Halloween cauldron, street hockey goal and sticks...

It's amazing how much the cabinets will hold compared to the open shelves that took up so much space. The sturdy angle iron shelves are next to vanish, in order to get the cars back inside out of the wicked sun.

Friday, June 17, 2011

Kitchen Remodel, Primed

Doesn't look much different, does it? Today the texture was sprayed on and dried, then primed.


All those unprimed areas will be hidden behind cabinets or tile.

Kitchen Remodel, Sealed

Wiring within the walls is complete! Everything has been sealed up, and the contractors are getting ready to texture the ceiling and the small amount of wall showing along the cabinets, mostly near the door and window.


Look at those six recessed lights, one still dangling! My personal favorite is the hole in the top center of the far wall, the opening for a real ventilation hood! It cost $300 to retrofit, so I'm sure the builder must have saved $100 max by not putting that in thirteen years ago. Just one of many cheap cuts that I don't understand.

The light over my sink is now centered. Although I assumed there must have been a stud that forced it off center, it appears there was no reason for it to be 3" to the right. Probably a contractor saved 2 minutes by not measuring back when. Instead they put in a spot light that could be angled to fix the issue. I've wanted a pendant there for years, but couldn't do it because then it would be obvious that it wasn't centered. Another excitement: the wall switch for the disposal is gone, to be replaced with an air switch on the counter next to the faucet. No more walking to the side of that 6 foot window, or leaning way over, to clear the sink.

Thursday, June 16, 2011

Kitchen Remodel, More Gone

Here's the state of the kitchen yesterday morning, even more gone than Day 1. The sheetrock wound up with so many holes that it became easier to just tear it out. You can see that the ceiling looks like a pincushion. The plywood is support for the hood to come. This is the part where it's not so clear what's happening. Wiring and plumbing is getting relocated to needed positions, and there's a lot of new wiring as well -- undercabinet lighting, puck lights in the glass cabs, recessed cans, pendants, etc.


Today, the sheetrock is all back up and getting taped and floated. The can lights are being cut out and extra wiring/boxes are being sealed up. Tomorrow is texture day; Monday is paint day. The cabinets should be installed on Tuesday!

Monday, June 13, 2011

Kitchen Remodel, Gone

The kitchen is no more. Well, technically, I have a stash of cabinets destined to be fitted into the workshop niche in my garage, but the kitchen itself is empty.


Tomorrow: electrical, plumbing, the hood vent, and drywall.

Sunday, June 12, 2011

Kitchen Remodel, Before

My kitchen is 95% packed up for demolition scheduled to begin tomorrow morning. For the record, here's the before shot. I know there are many people out there who would find this kitchen looks superficially great, and think I'm crazy to invest time, money and sanity in such a project. Hear me out.


It's not so obvious from a short distance that these are cheap, builder-grade vinyl-coated MDF cabinets. They turned from their once pristine white to a nasty nicotine yellow after only five years. I had them painted back to white, which helped for a few more years. Then the paint started wearing off, so there are yellow rings around the most heavily used knobs.


The vinyl coating has also now started to peel in places. It's a matter of time until I catch an edge and strip the whole front off.


At least one drawer has needed some heavy duty nailing to keep it together and a few hinges are wobbly at best, with screws that are trying to hold in disintegrating particle board aided by wood filler. We debated repainting, then refacing, then decided to just start over.


There's also some lovely white formica countertop. After ten years, it started to stain if someone just looked at it. Everyday scrubbing with power cleanser was required to keep the rings at bay, and even then there are marks that won't come out with bleach or any other wicked concoction this chemist has applied.

Appliances are what finally pushed me over the edge. The builders love GE, but I'm not a fan. I crave a cooktop that can boil water for pasta in less than 20 minutes or actually sear a steak. I demand an oven big enough to hold a full-size cookie sheet or two pies on a single shelf. I deserve a second oven for holiday cooking. I need a hood that actually vents to the outside world rather than just distributing smells and grease to all parts of the house. Getting the appliances I want required changing the cabinets, which just reinforced the notion to replace them.

Beyond that, there are more minor aesthetic and functional issues. First up, the great bug coffin in the sky, that sterotypical marker of 90s spec homes -- the fluorescent light box, nicely off center over the teeny, tiny island.


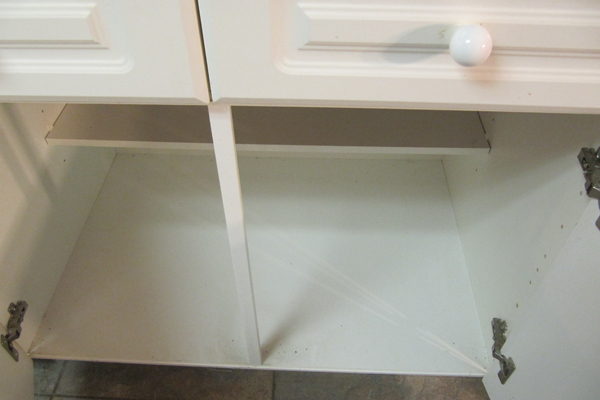
Second, the waste-of-space less-than-half-shelves in all the lower cabs, where you can't reach anything on the upper shelf without going into full prayer mode, making essentially one big shelf on the floor, perfect for pygmies.


Third, the novel dual-sided island with shelving on the floor again, and one third-shelf open to both sides to allow always losing the item of choice off the back, no matter from which side you attack.

Then there's the crown molding that stands on the top of the cabinets, obscuring any decorative items you might want to place up there on the unfinished, rough, impossible-to-clean tops. Even if you did put something up there, you'd probably forget that the corner is just empty space and lose said item into an unrecoverable entropy hole.


Perhaps if you weren't born under Libra, the fact that the green inset tiles are not centered behind the cooktop won't bother you. Well, really, they are centered with respect to the black burners, just not with respect to the entire cooktop, the hood, and the cabinets -- obviously a difference of opinion between me and the unknown tile setter.

I could continue.


There ARE a few things I love about this kitchen. It's white, which is a huge part of why I bought this house thirteen years ago. White kitchens are an anomaly in Texas suburbia, where worship of oak in the nineties and now cherry is the rule. The bump out window, though placed a bit low for my extreme height, is my favorite window in the house, where I can watch the bird feeders and grow happy orchids and African violets. I also adore my handblown light fixture from Wimberley Glass and my Miele dishwasher, so they get to stay. As the only other fixture in the room that I selected, the updated 18" floor tile will remain, as long as the new tiles I rounded up for the repairs match well enough. Everything else, including the step-in corner pantry with the ever cluttered floor preventing such a step, disappears...

tomorrow.