![]()
The trickiest and most interesting part of electroforming beads is the design process. Because copper does not adhere to glass, the attachment must necessarily be one of entrapment. The physical shape of the bead must prevent the copper from falling away.
Conventional bicone or round bead shapes offer a number of design concepts for entrapment. The most obvious is a cage structure. For a regular pattern, a Sharpie can be used to mark crossing lines before using a fine brush to apply the conductive paint. An organically-shaped cage works well as long as a sufficient surface area is covered with metal -- long, narrow lines of metal can be weak. Caging the bead with protrusions on the surface such as raised stringer or dots may also hold the copper in place. A waist constriction is another effective entrapment method, as in Kate Fowle's electroformed beads that often incorporate a structure that resembles two fused bead shapes. Openings in the bead are one obvious way to prevent escape of the metal. Most of the designs I've seen in the bead world follow either the cage or waist type attachment methods, but possibilities for attaching electroforming are myriad if the bead design is more unorthodox.
To prepare the bead for electroforming, first clean the bead to remove any oil or dirt that may prevent the conductive paint from adhering. Etching the bead can provide a bit more tooth to hold the paint. Remember that the finished surface will never be smoother than the paint appears, and may roughen substantially at any points of irregularity. If a smooth surface is desired, then the paint must be free of brush lines. Multiple thin coats of paint may provide a better surface than one thick coat. Try to avoid touching the conductive paint as oil from fingers may inhibit copper growth. The paint needs to be completely dry before immersing in the solution.
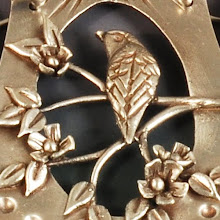
I'm most often asked "How do you get the controlled texture on your metal coating?" The answer is that the metal coating will echo the surface I present to the solution. For a smooth surface, take pains to apply the paint smoothly. For a beaded edge to a line of metal, apply tiny beads as desired. All that matters is that the surface is conductive. Anything that can survive coating with paint and immersion in acid is usuable. Janelle Zorko attaches real leaves and flowers to her beads with fiber cord. Ann Davis sculpts her designs from jeweler's wax and then paints them. Kate Fowle uses tiny glass marbles. The drawback to any of these methods is the degree of delicate and time-consuming work, but the results can be breathtaking.
The final consideration in preparing the bead for electroforming is the point of electrical attachment. Many beads work well when suspended by a copper wire running through the mandrel hole and turning up at the bottom, with the end of the wire in contact with the dry conductive paint at some point. Actual attachment with paint is not necessary, nor desirable, as then the wire would become part of the bead. Since copper deposition is blocked at the contact point, moving the wire several times during the process prevents formation of a pit on the surface.
In the next discussion, I'll have photos of the components and assembly with a full guide to putting the process in motion.
Saturday, May 31, 2008
Understanding Electroforming, pt. 4
Labels:
electroforming


