My weekend workshop with Kate McKinnon was fun and informative. The topic of note was boxes and birdhouses, but Kate is a very open teacher and invited questions about any of her techniques. 
We learned about many of the techniques detailed in her book "Structural Metal Clay," which I highly recommend, and more from her two upcoming books on mixed media and sculptural metal clay and DVD:
- treasure boxes to display a favorite bead or other treasure (I'll be thinking about those in the future)
- architectural construction for houses and birdhouses
- rings of many types: strap, heavy wire, rivet (for beads), stack, etc.
- tree branches and other work with wire armatures
- ball rivets
- making attachments
The only frustration I had with the course was a firing issue. Some of the houses, like mine that had openings, were filled with vermiculite for support. However, too much vermiculite meant the houses bulged like little balloons during shrinkage, even popping less than perfect seams. Beyond that, the kilns fired long (another experience of fire brick vs. baffle kilns to add to my data set) and too hot, giving time for crystal domain growth leading to sparkly silver. It's the analog of devitrification on glass -- hold too long at just the right temperature and the mobile silver atoms rearrange themselves into glitter. I know some people love that look, but I'm not one of them.
My bulgy birdhouse above has been hammered back to something approaching original shape and had its seams reinforced. Not too much glitter here.
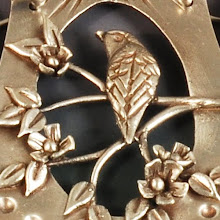
Bits: a bird and blossom on a 10 gauge wire to form into a ring, a couple of big head rivets for later attachments, and another bird on a wire to insert into the birdhouse (there's a hole in the bottom that needs to be enlarged).

This small open roof house still shows the horrific glitter back. I've never seen an example this extreme, so I hope that all polishes out. The open roof accommodates one of my enamel-painted glass tiles, with a jump ring through front and back holes to keep it in place, but leave it interchangeable.

Here, I've straightened the walls (and the bottom after I saw the photo) and popped a glass tile in to show what it will look like.

I have more to show and more to do, but right now chemistry class is calling me.


