I'm a bit sad to see my tenure as a Master Muse coming to an end. Today my final challenge tutorial appeared on Tonya Davidson's blog. You can see all the past Master Muse tutorial synopses (this is #48!) here.
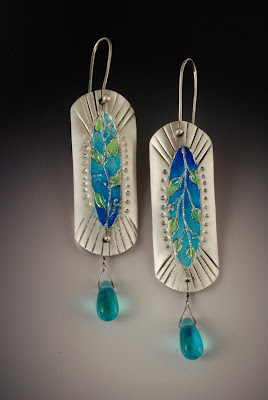
The challenge for this sixth project was to use syringe creatively. I personally like drawing with syringe clay, so I designed a pair of earrings utilizing the syringe lines to create cells for enamel. Traditionally, fine wires are shaped and attached to a metal backing in the technique of cloisonne, so this is a quick and easy way to get that look. I wet-packed the enamel into the cells, using a variety of colors to create shading and depth.
It was a fun project, despite a few frustrations. I kiln-fired the enamels, using the Paragon SC-2 that I use routinely for metal clay. I don't typically use this kiln for enamel (I have another tiny kiln that I prefer because it recovers faster), but thought I should use the one that most potential users of the tutorial would have on hand. I found that the door closure jarred the enamel powder enough to scatter it on the face of the piece. Boo, hiss! Unwanted color in the crevices. But then I went and read my copy of Pam East's Enameling on Metal Clay and found that she learned this before me. If only I'd done my research, I could have followed her recommended fix before I made the blooper.
As I tell my students, making these mistakes is the best way to ensure that I'll remember the lesson next time.


