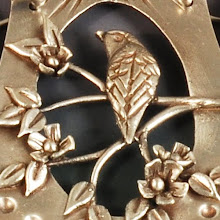
Nothing like diving right in, right!? I pulled out a 30 gram package of FastFire Bronze Clay that I acquired last summer to give it a try. My previous carving experiences have been with the original Bronze clay, so I thought this would be an interesting comparison.
The clay was dry and had to be remoistened. I simply sprayed with water, wrapped in plastic for a few minutes, then rolled and folded a few times to recondition the clay to a nice consistency. The lump of clay was too small when rolled to six cards thickness, so I had to drop to five. This is really a bit thin for a piece where I'm going to carve away the center area, but it will do for an experiment.
I traced my tree brooch drawing onto an index card and cut out the opening to form a template, which I used to cut the shape.
Once dried, I roughly sketched in my tree motif with pencil.
Then I went to work carving. I find it easier to keep the work elevated on a rubber block, as it gives me a better angle with the carver. The clay was buttery and easy to carve. However, I found there to be isolated spots within the clay that seemed hard, more copper colored than the bronze clay, and rough. Perhaps these are pockets where the copper and tin powders are not well mixed? We'll see how that looks when it's fired.
Of course, I forgot to practice carving before starting in on the real piece. My favorite practice material is a baked sheet of polymer clay. It pays to get the feel of the tool again before expecting to be able to carve details. Consequently, this piece is pretty rough. Also, the thin layer of clay limited how much relief I could achieve. More would have been better. Now I must decide whether to modify the design by adding my more typical sculpted tree on top. That would add dimension, and be a good experiment in working with this new-to-me clay. I just happen to have another 30 gram package reconditioned and ready to go.


