My first set of repairs with sterling silver clay came out of the kiln yesterday. I wasn't sure how to approach it. Is it really necessary to do a full 2-stage firing for a tiny repair? So I experimented.
 |
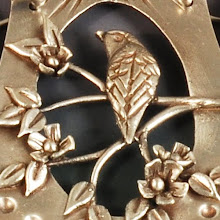
| Bird Heart back ©2012 Vickie Hallmark sterling silver |
This hollow heart charm developed a crack on the initial firing because I buried it without thinking about the carbon inside causing pressure during shrinkage.
To make the repair, I added fresh sterling clay, not trying to perfect the seam, but pretty much just piling it on over the crack (unfortunately, I didn't take intermediate photos!). I skipped the open shelf firing, reasoning that there would be enough oxygen in the kiln to burn out the tiny bit of binder. Then I placed the heart on a scrap of heavy-weight fusing shelf paper to protect the opening when buried in carbon. I did a shorter, 1-hour firing at 1500F.
When the heart came out, the new clay was darker than the old, so I worried that perhaps it hadn't sintered. The shelf paper was grayish black instead of the usual white. I know that the paper turns black as its binder burns out, but then goes white and powdery when fired in oxygen. When I hit the repaired silver area with the polisher, it went bright silver, relieving my worst fears. Then I took some sandpaper to the back to remove the slight elevation of the repair. After working through finer grits, I can't see the repair at all except maybe a tiny divit at the edge that I still need to polish out, so I'm calling this one a success.
Now I just need to clean up the hole, which evidently got a bit of clay as well, and republish the heart opening edge and call it finished!


