I've blogged many times about how I use my sketchbooks to work out design ideas. More and more frequently now, I actually reduce sketches to practice, with very close resemblance. For example, I blogged about the long delay while I learned to make the beads I drew in my sketchbook in just the way I'd visualized them here. My motto is "if I can draw it, I can build it." My choice of sketchbook to keep in my bag has heretofore been a large (5"x8.25") Moleskine plain paper sketchbook. I've gone through a stack of them, and more recently I have turned to the Volant soft cover notebooks that come in fun colors.
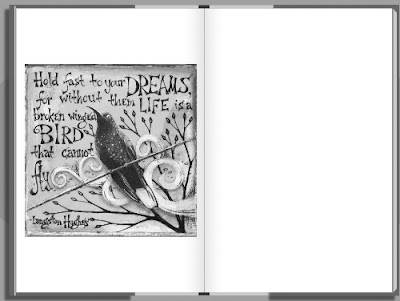
A few weeks ago I was thrilled to receive an announcement from Blurb that they were offering a new blank paper notebook option. As soon as I found a few free moments, I whipped together a sketchbook with illustrations from my Bird Journal and ordered copies in color and black-&-white to inspect. Now I'll be giving them a whirl as new tote-around sketchbooks.
Want a notebook with your own personal artwork on the front? I can imagine lots of possible uses besides sketching -- a log of accomplishments, a 'to-do' list file, a guest book for studio or booth, ... Just follow my easy directions below. My design is also available in my Etsy shop.
Design Your Own Notebook/Sketchbook:
- Download BookSmart bookmaking software onto your computer from Blurb.com .
- Start BookSmart and select Notebook, a 6" x 9" format book with full-color covers and blank pages. Click Continue.
- Choose Lined, Grid or Blank pages, then click Continue.
- Upload images from your computer or photo sites (you can add more later). The optimal cover image sizes are 1684 x 2584. I used Photoshop to add borders above and below to my previously square images. Click Continue for the guided step-by-step construction.
- Drag photos from the 'My Photo's pane on the left side to the target cover or page. A slider bar at the bottom lets you scroll through the 100 pages. Just click on the page of choice to edit. This notebook template is set up for photo insertion every sixth page, but you can just leave the entire thing black inside if you prefer. I just drug in one of my high resolution square images to each of the templated image pages. These can be printed later in either color or black&white.
- Add text (title and author, for example). I did my text when I added the borders in Photoshop, but it's easy to add here.
- Make sure you add the back cover and a copyright statement somewhere inside.
- At any point, click "Preview Book" to see what the book will look like. Beware images at too low resolution -- a yellow warning sign will appear. Return to make changes by clicking "Edit Book."
- When the book is finished to your liking, from the Preview, click "Order Book."
- Fill out information about the book, choosing whether it's private or public, add an author bio, set up preview pricing info, and order from the Blurb link. B/W notebooks are obviously much less expensive than color. That's all there is to it!


