Thursday, July 25, 2013

Variations on a Theme

Today I have three new variations on an earring theme. I've had a bad cold, so the most work in the studio that I could muster was fusing together components with some heavy wire to make these new dangles. Available now in my Etsy shop.
Rock Rose Trapeze earrings
©2013 Vickie Hallmark
sterling silver
The first variation uses medium rock roses with double small leaves on either side.

Rock Rose Long Drrop earrings
©2013 Vickie Hallmark
sterling silver
The second variation has  single large rock roses with medium leaves below. The heavy wires in both cases are about the same length, but more curved in these.
Rock Rose Swing earrings
©2013 Vickie Hallmark
sterling silver
The final version has double small rock roses with medium leaves below and a couple of berries. 

All in all, a fun set that were easy to fuse together because of the properties of Argentium sterling silver.


Saturday, July 20, 2013

Similar Earrings, Different Paths

This morning I finished the Periodot Leaf Bud earrings that have been sitting on my bench for literally months.

Peridot Leaf Bud earrings
©2013 Vickie Hallmark
sterling silver & peridot

These earrings started off as modifications of sketches I made on my iPad when I was exploring this new leaf series.


All these designs incorporate the leaf-on-leaf design from my early double leaf earrings, a favorite of mine. Early in the process I drew single leaf earrings with tube set stones, since I'm really drawn to more color in my work. 


Then I drew double leaf earrings with stone "buds." The leaves are all small and similar sized.


Then I got the idea to mix up the leaf sizes, which led to the Garnet Leaf Earrings, made at about the same time as the Peridot Leaf Bud earrings. 
Garnet Leaf earrings
©2013 Vickie Hallmark
sterling silver & almandine garnet
Those earrings went through the convoluted casting learning process, while the peridot version languished on my bench waiting for their own attention. 

Since green is my favorite color and a staple in my wardrobe, these may become my new "go to" for regular wear.


Wednesday, July 10, 2013

From Drawing to Metal

A few weeks ago, I wrote about my design process for a custom ring. That post detailed how I start with an idea, develop the drawings, and convert them to texture plates. Finally, I'm happy to report that the design has been reduced to metal.

Canary Ring
sterling silver
©2013 Vickie Hallmark
I used the original texture plate to impress the design into sterling silver clay, which was dried over a domed form to give the bowl shape. Then I hand-fabricated the ring shank from Argentium sterling silver. I felt it needed to be wide enough to support the one inch diameter top, but wanted it to be comfortable to wear, so I cut the band five millimeters wide, but filed a taper on both sides to reduce the edge against the palm to just over two millimeters. In the next photo, you can see that I also used my leaf vine texture to simultaneously pattern the back of the bowl.

Canary Ring, back
sterling silver
©2013 Vickie Hallmark

The Argentium band was secured to the unfired clay form via extra clay, including my usual small oval hallmark with my swallow, initial logo, and .925 quality mark. Then the entire ring underwent the two stage firing process required for sterling clay. First, the ring was supported in vermiculite while slowly heating to 1000ºF and holding for thirty minutes to burn out the organic binders that glue the tiny metal particles together in the raw clay. During this stage, the Argentium darkened somewhat, but didn't develop fire scale like regular sterling would. Then the ring was buried in carbon and refired at 1500ºF for two hours to allow the metal particles to move to compact and sinter the metal into a solid piece of sterling silver. After cooling, the entire ring had a very slight golden color to it, which was quickly polished away.

Canary Ring
sterling silver
©2013 Vickie Hallmark

I think this is my new favorite ring!!

Monday, July 08, 2013

Beginnings of My Flock

It's interesting to sit and make bird after bird by hand from metal clay. Detailed observations are required. What poses look natural? How do I fit enough detail into a tiny half inch bird with just my fingers and a few simple tools? Which details are crucial; which can be omitted? Simplify, simplify, I repeat to myself.


The first few birds often feel awkward (the four on the left above were the first made on two separate days). There are always a few birds that I like more than the others - they have better form or expression or detail. Now I have the beginnings of my flock, and I must decide whether to actually move all forward to the metal stage, or set aside the less than successful to reconstitute. I have a nagging feeling of a mother choosing amongst her children, but I guess that's the beauty of molding - I can keep only the best.

Thursday, July 04, 2013

A Flock of Bird Components for My Jewelry

I'm known for my bird themed jewelry, where each bird is hand-formed individually just as nature would do it. Unfortunately, there's a lot of work involved in sculpting a half inch bird by hand from a pea sized lump of metal clay. That limits the amount of jewelry that I can produce. Many people over the years have suggested that I mold my birds and reproduce them. I've always resisted. Until now.
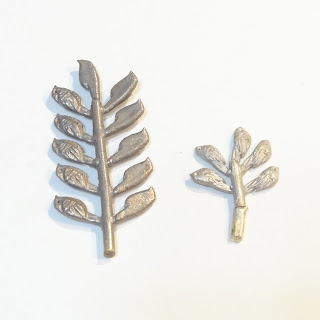
bird casting trees

Finally, I've realized that I sometimes procrastinate on delicate, fussy work (who, me?!) such as birds. While it's lovely to make exactly the right birds for each piece of jewelry, it is frustrating to have to spend time getting in the flow to be able to easily get the expression that I want for a bird. I did mold a couple of birds and shoot multiple waxes of them in one of my casting classes, which I then assembled into bird trees to mold again later in class. That enables me to easily cast multiples of each of these two.

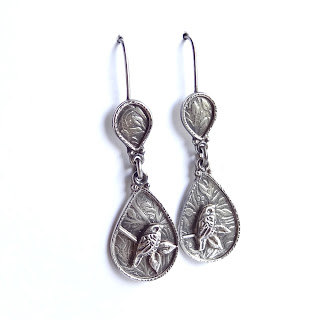
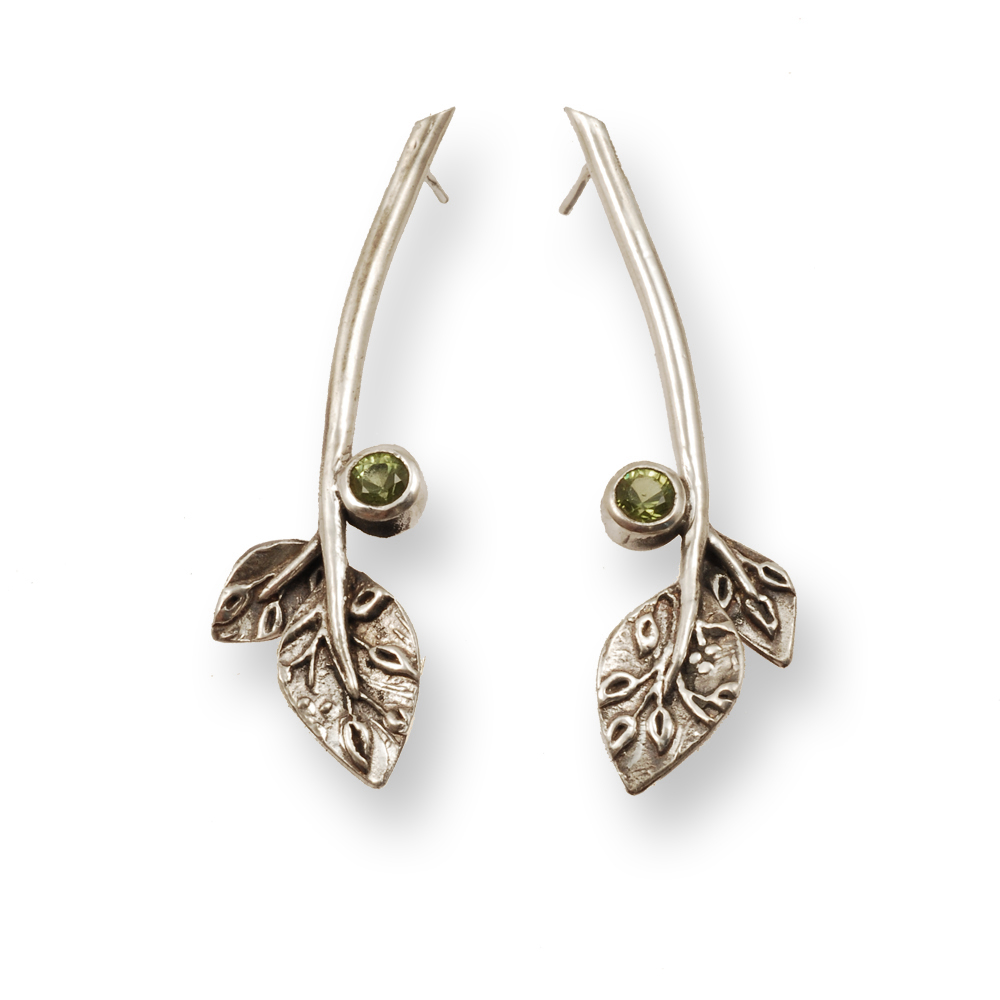
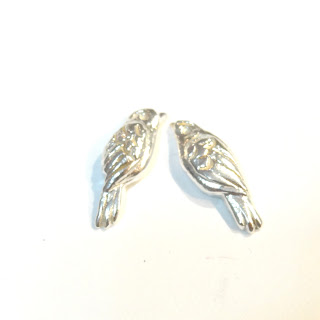
Bird Teardrop earrings
©2013 Vickie Hallmark

But then I've gone to use them in jewelry and gotten frustrated that I only have a couple of different birds, two different sizes and facing the same direction. I like my earrings to be mirrored, with the birds facing both directions. I've come to a realization.

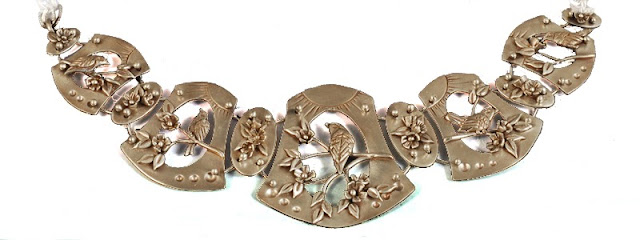
Spring Flock necklace
©2012 Vickie Hallmark

I need a flock! Big birds and little birds. Perching birds and flying birds. Recognizable wrens and cardinals and hummers, as well as generic birds. Birds from the back and front and side. Matched, mirrored pairs of birds and single birds. Upright birds and horizontal birds. Left wingers and right wingers. A variety, like I would use on my Flock necklaces.
component bird pair

So I've committed time to sitting down with clay and working on just that - a flock of birds to mold and cast so that I always have exactly the bird in the hand that I need. It's time consuming prep, but  of course repetitive work builds skill and the birds get better as I do more. And hopefully (right!), procrastination will recede.

Tuesday, July 02, 2013

Bezel Setting Stones in Jewelry

I'm really drawn to more stones in my work, which means more stone settings. I love the look of bezel set stones, where a piece of metal is pushed over the entire perimeter of the stone to hold it securely in place.

Full Moon earrings
©2012 Vickie Hallmark
The easy approach to bezel settings is to use a pre-formed bezel cup. These commercial components can be embedded into metal clay, soldered to fabricated metal, or fused into place onto Argentium. The cups are pressed from very thin metal, usually 32 gauge, which makes them very easy to close over the stones but also weaker and less of a visual statement in the work. You can barely see the edge in the Full Moon earrings above. Such thin bezels are also useless for masters to be molded for casting because the wax will be too thin for good metal flow.

Bird Song brooch
©2012 Vickie Hallmark
The more complicated approach to bezel settings is fabrication. A strip of thin metal, either purchased bezel strip (usually 28 gauge) or heavier sheet, is formed to the exact shape of the stone to be set. While the seam is usually soldered, Argentium offers the advantage of fusing the seam. Since solder always tarnishes first, a soldered seam becomes quickly visible, whereas a fused seam stays invisible. While round bezels are easy to form with a mandrel, other shapes of stones require more fuss and experience. The hemimorphite druzy in my Bird Song brooch was made from 24 gauge sheet.

Cloud brooch
©2012 Vickie Hallmark

Tube setting is another straightforward type of setting, where short lengths of purchased or custom fabricated tubing are cut to length and soldered or fused into place. A seat to hold the stone is cut with a bur into the thick wall, and then the lighter remaining metal is pushed in over the stone to hold it firmly in place. This method is often used for tiny stones, and I've been purchasing a lot of 2 mm stones for this purpose. My cloud brooch has five white CZs, and I actually purchased a few diamonds to use in a special piece.