Showing posts with label Ring a Week. Show all posts

Tuesday, April 05, 2011

Ring a Week 14/52 -- Glass Bird Rings

And now for a little diversion. My DH and DS went to an airshow over the weekend, leaving me home alone with my art supplies. I spent a lot of time on the torch, since I haven't been out there much over the last year. I got to try out a lot of experiments from my idea stash. The foremost was to make a glass ring to keep up with the Ring a Week challenge.


Several weeks ago, I bought a large round mandrel that I thought would be big enough for a ring. My idea was to sculpt a bird ring, similar to the bird rings I carve out of bronze. Glass, of course, is a different beast. But this was the first experiment. The hardest part was to get the glass (semi)evenly deposited onto the mandrel in a ring. I decided I needed to work right at the end of the mandrel, where I had the edge to guide me, rather than in the middle of mandrel, where my wrap didn't exactly meet up -- that was a seriously jogged first ring! This first effort is rather simplistic, but it shows that I can make it work.


I ground out the inside of the ring to remove any sharp edges. It fits quite well on my size 8 forefinger. How sturdy it is? That is the question. I guess I need to wear it around some to see how it takes knocks. I made the bird fairly stocky to avoid weak glass points on the beak, wings and tail.

Since I only have the one mandrel this size, it's a one ring at a time experiment. Next round, I'll get a bit more elaborate.

Monday, March 28, 2011

Ring a Week 13/52 - Benefits of Working in a Series

My desk is starting to be littered with rings...and we're only one quarter of the way through the challenge. Because I liked the ring from last week so much, I decided to riff on its design. That brought me to thinking about the benefits of working in a series.


I was quite taken with the simplicity of the design last week. The ring was, in many regards, the easiest and quickest to build of all the rings I've made so far in this challenge. On the other hand, it wasn't by any means the least of the collection. In fact, it seemed rather refined, with the reverse relating so beautifully to the front, the egg shape echoing the nestling, and the satin finish yielding an elegant, polished tone. Where do I go from there? Do I do the obvious and simply reproduce it with a different image in the center? Do I add enamel to bring in a pop of color? Do I set it aside to revel in my feeling that it's superior and I can't top it, so I should go back to another design for a reinvention?


Instead I decided to try a merging of two designs, which is quite typically where I'm always working. I like that "on the fence" place, I guess, where I try to combine two ideas that I've been working on separately to find something new and exciting. That's when I spotted the toggles lying on my work table, victims of a rejected class proposal, looking forlorn and forgotten. One of the toggle rings had a similar shape to my nestling ring, with an oval opening in the center. Ah...I could cut my top a tad differently and add an extra triangle for a roof to make a birdhouse ring!

Away I went to quickly cut out the pieces needed, deciding to place a perched bird inside the birdhouse. That's where I erred a tad. I placed the bird too high, forgetting that the roof would hide its face, leaving it a birdhouse for a headless bird. Not quite what I had in mind! So I omitted the roof and just embellished directly with rose and leaves. I guess I have another iteration to try for next week.

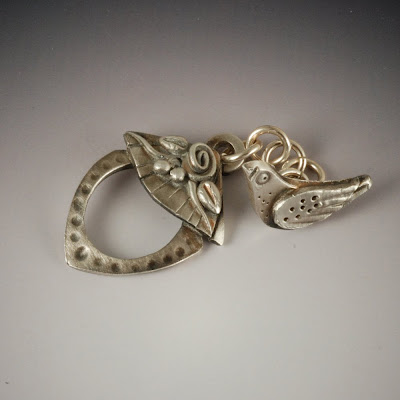
I'm missing my Master Muse tutorial sessions. I enjoyed designing the projects and photographing all the steps and writing out instructions. I wonder if there would be any market for small PDF tutorials to sell through my Etsy shop. Beadmakers do this all the time; perhaps it's time for metal clay to get in on the fun. This birdhouse toggle clasp is first in line for such an experiment.

Saturday, March 19, 2011

Ring a Week 12/52

I found a new simple ring design that I love. I think I might make a whole handful of these. Here's the first, Nestling.

Fledgling Bird Ring by Vickie Hallmark in fine silver. bird, tree, branch, nest, baby, metal clay, pmc

Fledgling Bird Ring by Vickie Hallmark in fine silver. bird, tree, branch, nest, baby, metal clay, pmc

It was rather serendipitous design. I cut an oval and then a frame for it that had a hole too small. As both were drying, I cut another image into the proper size oval. Eventually I stacked them all up with the ring embedded between. Easy as it possibly could be.

And I finished ahead of my deadline this week!!! See the rest of the challenge offerings at the Ring a Week Flickr site.

Tuesday, March 15, 2011

Ring a Week 10 and 11/52 -- Metal Clay Strap Band RIngs

This week I made two rings to make up for one of the weeks I missed due to being away. After prowling through my sketchbooks for new ideas (why haven't I drawn anything in there lately??), I decided to try a new strap band ring design. The band was fired flat, then drilled and attached to the top with beaded rivets.


I'm not crazy about this strap band design. The rings feel too flat and dimensionless to me. The strap band attaching at the edges makes the ring shank less than round. I did like the ring face designs, so I think I'll try to do the shank differently with a similar top. Even as I write this, modifications are popping into my head. Next week's ring is coming right along (maybe I'll even be on time).

Monday, March 07, 2011

Ring a Week 7, 8 and 9

Finally, I'm catching up a tad on my ring design. As you can see, I have plenty of ideas to explore, but time to execute is sorely lacking. Today's offerings aren't quite up to my standards, as I see some finishing issues I slighted by rushing to get all three rings into the kiln last night. I suppose this is how I learn which things need more attention.


First, I wanted to incorporate a larger stone, so I built a mounting for this 12x8 mm pear shaped purple CZ. My method for using polymer clay to create a mold for the mounting was a bit clumsy and more tricky than it needed to be, but now I have new ideas for how to do that more simply next time. I inserted the CZ with mount into a cutout in a domed disc, knowing that shrinkage would distort the circle to an oval. I planned my design to incorporate that and it seems to have worked fairly well, although there is some asymmetry that I would like to learn to control better.


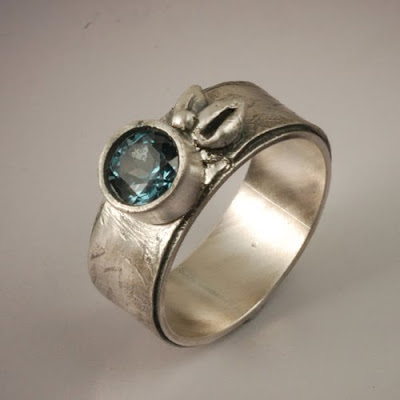
Second, I decided to try a tube mount for a faceted round blue spinel. I learned this technique from Gordon Uyehara at a workshop in Florence, Italy several years ago, but haven't used it since. Even then, I modified the technique to avoid the seam in the tube because of fears of it popping open during shrinkage around the stone. This time I tried Gordon's method and, while the seam didn't open, I can SEE the seam, so I obviously didn't get it perfectly merged. Tricky, tricky. I also had an issue with hiding the seam in the wrap around the ring liner. I thought I would hide the seam completely with leaves and details, but wound up liking the simpler look that leaves that seam a bit too exposed. I did a bit of repair and refired, but it still isn't up to my standards. The concept is interesting however. There are many possibilities to ponder.


Finally, I slapped together another plain domed disc ring made with a texture of one of my Zentangle drawings. This ring I find extremely effect for its simplicity to construct.

Lessons to work on:
  1. Plan better for shrinkage of metal clay vs. other materials, either fine silver or stones, including distortion and reinforcement.
  2. Consider how to make ring inserts blend more effectively: file down edges after shrinkage? Wrap? 
  3. Think more about how revealing macro photos appear -- why do I always see defects here that aren't apparent to me at the stage where it would be easier to correct? Do I need to look at pieces with a loupe? Or buy serious magnifiers? 

Sunday, February 20, 2011

Ring a Week 6/52

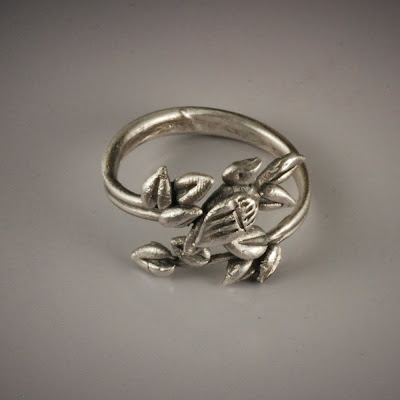
Though a week behind due to illness, I'm carrying on with the Ring a Week challenge. Yesterday, I decided to try a new ring idea. I brainstormed something simple and quick, but still metal clay.


Since I've been working on some sculptural pieces, I decided to take that approach to the ring, rather than the texture plate work I've done on all the challenge rings to date. I started by wrapping snakes around a dowel and then tried to add leaves and a bird. After major frustrations with that format, it finally hit me that I could work flat and form the ring afterwards.


True, fine silver is not very strong, so it isn't the best choice for this ring, but I view it as a quick check of viability of the technique: estimation of length, mental design of the two ends to overlap, etc. Now I need to pull out the PMC Pro, which is so much stronger, and try with that. Forming will become the more difficult step then, with hammering and annealing required, but I'm thinking this still might be a fast and easy ring.

Sunday, February 06, 2011

Ring a Week 5/52

Here I am again, dragging in a ring just under the wire. I had high intentions of more enamel for this one, but just ran out of time. Something about the defensive driving course eating my entire Saturday. It would have looked so nice with a ring of graduated green enamel to surround the peridot, but I like it still. Simple is good.


It does at least fit nicely into my progression of rings. One by one, I pull out old tricks to add to the old ideas. That's the way a series works. Eventually I'll have to dream up something new. 


Monday, January 31, 2011

Ring a Week 4/52

While I thought I was catching up last week (really, I was!), I still managed to fall behind schedule on my Ring a Week construction. I decided (wisely, I think) that doing the enamel work last night after 10 pm was not the right choice. So it had to wait until afternoon today.


I just finished another project that I incorporated enamel into, my final Master Muse tutorial, so I really wanted to try some enamel on a quick ring. This is a spin-off on my second ring, but with a pop of color. When I went to fire the enamel, it occurred to me that I had no sure idea how to support a ring well in my kiln for enameling, so I decided to torch fire it, which was very quick and easy.


I have a couple more variations in mind, and even components lying about on my table. Perhaps I'm catching up after all. I could stand to have a bit more time to fuss with the enamel, to clean off the exposed silver better, etc. Time -- the limit of creative output!

Sunday, January 23, 2011

Ring a Week 3/52

As I showed earlier in the week, I embedded an enamel-painted glass tile into this fine silver metal clay ring. This was the first time that I used a fine silver ring form from Metal Clay Findings, but it won't be the last. It's a very straightforward, easy way to get a perfectly sized ring. I just wrapped a textured length of clay around the form, mounted it onto the box that holds the glass, then fired. The top window was fired separately, then attached with oil paste and extra decorative syringe clay to the box once the glass was set in, then popped back into the kiln for a second firing.


You might have noticed that this glass tile is not the one I showed before. That one needed a bit of grinding to fit after shrinkage, whereas this one dropped right in. Laziness wins at my house. The nestlings will undoubtedly get their day eventually.


This ring is in the style of my Garden Window pendants


and Birdwatching bracelet.

Sunday, January 16, 2011

Ring a Week 2/52

Here it is late Sunday evening and I'm just squeezing in under my (self-imposed) deadline to post my second ring for the Ring a Week challenge. I've thought about this off and on all week, but there just was no time to work on it until today. So I built it this afternoon, fired it after dinner, and finally buffed it up a bit and popped it into the photo tent. Only to find that the camera battery is almost dead, and I didn't really polish it well enough (it's too dim in my studio at the moment). But these photos will have to do, because I can't remember where I put the battery charger.


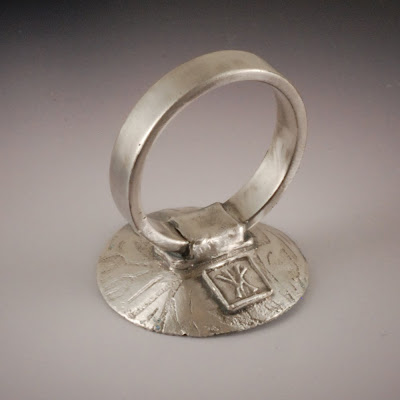
I used heavy fine silver wire for the shank, embedded into a pad of moist clay attached to the underside of a mismatched lentil bead. The texture is from a rubber stamp made from one of my line drawings. There's a faint relief of a similar design on the back (tear-away), the filed edge finish I love so much, a bit of syringe beading around the junction between pad and lentil, and my logo, of course.

Sunday, January 09, 2011

Ring a Week 1/52

Speaking of being sucked into challenges! Last year I was insanely jealous of the treasures posted in the Ring a Day challenge, but knew for certain at the beginning of the year that 2010 was not a year that I could make such a commitment. So this year I was pleased to see a more moderate challenge, a ring per week. I decided to honor my desire from last year and take on another challenge. Normally, I'm not much of a challenge type. I prefer to do what I want to do, so the only way to suck me in is to make the challenge align with my own intrinsic direction.


I started off with a simple project, utilizing a piece that has been lying on my bench since August. There were some issues with the fine silver bezel that made it not work for mounting the enameled copper dome that was intended, so it was tabled. Polymer clay allowed me to cope with those issues, quickly finish the ring (a plus this busy first week), and still keep in step with my usual body of work.

To see the offerings of the 200+ members of the Ring a Week challenge, check out the Ring a Week Flickr account.