

Lora Hart just blogged about her experiences as a juror for the upcoming fourth edition of the PMC Guild Annual. I'm pleased to announce that four of my metal clay creations will appear within those illustrious covers this year!! Lora gives her perspective as a juror on making selections and, as usual, the number one negative issue for many artists who submitted worthy work: lack of highest quality photographs.
Lora mentioned my three part photography tutorial, much to my delight. So, as requested, rather than have you searching all over my blog for the three parts of the tutorial, I've done as asked and added a link to the three page photography tutorial on the sidebar. Or you can access it here.
Showing posts with label photographs. Show all posts
Showing posts with label photographs. Show all posts
Friday, June 25, 2010
Photography Tutorial
Sunday, December 06, 2009
Photographing Metal Jewelry and Glass Beads, Part 3
So you wondered what happened to the finale of my tutorial on photographing metal jewelry and glass beads? Truly, I hadn't forgotten, just gotten distracted. Need a refresher on what I covered before?
First, I run my camera in full manual mode, not using one of the preprogrammed modes that are so easy. I need to be able to control both aperture and exposure simultaneously.

Aperture size controls the depth of field, which for jewelry is really critical. Depth of field means the physical depth of the target that is all in focus at the same time. I don't want the front of my ring to be sharp, but the back to be a total blur; I want to see the entire thing! Physically, the aperture is an iris diaphragm that closes down to restrict the light entering the camera and improve the focus. It is a function of both the camera and the lens being used and is marked in "f-stops" or "f-numbers", beginning at perhaps f/1.8 and increasing to f/16 or so for a standard lens. For jewelry, I recommend AT LEAST an aperture of f/16. One of the advantages of my nice macro lens is that it has higher f-stops, from f/2.8 to f/32 which give it higher depth of field to get more foreground and background simultaneously in focus.
Of course, when that aperture is closed down to make a better focus, less light gets into the camera, affecting the necessary exposure time. The times may get longer than a human can easily hand hold (I can't hold beyond 1/8 sec, for example), so that's why the camera is supported by a tripod or a copy stand. The way to measure the determine the necessary exposure time is to use a light meter, either the one on the camera or a separate instrument. I typically use my camera meter as a first approximation. Another factor affecting exposure time is the ISO equivalent. In the days of film, this number related to the size of particles in the film you purchased, and it determined how fine the detail on the negative was. A higher ISO allowed you to take photos in low light. The ISO has no real meaning for digital cameras. The equivalent measure is really where noise issues in the electronics inside the camera come into play. My camera has no real noise issues up to equivalent ISO 1250 or so, so I use an arbitrary ISO of 640 just to make the exposure times relatively low. It seems better to not need to take really low exposures -- less possibility that I bump the table, etc.
Here's the procedure I use to take standard photos:
- Use the largest photo format.
I can always down size the photo in Photoshop later, but I can't ever make it bigger. I use a normal JPG format, but RAW would actually be even better. I just avoid another conversion in Photoshop, which I might be willing to make if a publisher required it. I set the ISO to 640. - Place the background on the copystand, then arrange the jewelry so the view through the right angle finder and camera is to taste.
I may need to raise or lower the camera to get everything to fill the frame nicely. - Set the aperature to f/32 (or f/16).
- Turn on the two photoflood lamps.
See the photo in Part 2). I only have these on when I'm truly using them, since they burn out fast. - Focus on the desired area of the target.
This may be easier to do in manual mode rather than automatically. - Use the camera meter to set the first exposure.

Preferably use a spot meter option, so that you can choose exactly where you want to meter. Looking through the viewfinder, I see a meter at the bottom, with 0 in the middle, and numbers to either side. I adjust the exposure time on my camera until the meter reads zero. Note that when I'm viewing through the right-angle prism, I can't see that meter. I have to contort myself inside the tent or use a mirror to see the LCD display. Fortunately, this setting really doesn't change a huge amount among different shots since it depends on the lighting setup which won't change. Once I get it close, I'll only be changing it slightly as needed. - Take a photo and check it.
Since my photos upload automatically with the Eye-Fi card, I open them in Photoshop and check the focus and exposure. The focus will be obvious. The exposure will too, to some extent, but you can also look at Levels under Adjust Lighting to get a more quantitative feel. Ideally, the levels will range from 0 to 255. If the Levels are all low, the photo is too dark and the exposure needs to be longer. If the Levels are all high, the photo is washed out and the exposure needs to be shorter. - Adjust the exposure slightly and shoot again; repeat until you're satisfied.


That's it! Sounds simple, right!? Of course, there are always issues. Perhaps I want to shoot that ring from a side angle instead of straight down. In that case, I set up a tripod at an angle. Reflections are always big issues for metal and glass. Watch for those in the viewfinder. The tent will help a lot with this, but even so, sometimes I need to use white cardstock to block off reflections, from the copy stand post usually.
Now, I'll bet you want a Part 4 on using Photoshop to deal with the images, hmm?
BTW, I just did an online search for bead photography and found the following good links:
beadphotography.com
Jewelry Photography
a tutorial on Wet Canvas
Saturday, June 20, 2009
Photographing Metal Jewelry and Glass Beads, Part 2
Secret weapon time! Here are some of the goodies that make life much easier with my photography set-up.
First, the larger tent was really necessary when I planted the copystand inside with the lights on either side. You can see the camera handing lens down at the top of the rack and pinion drive. 
It's impossible to get my head inside there to look down upon the jewelry, so the first secret weapon is a right angle finder, a prism device that turns the viewfinder image so that I can look straight into the camera.
Oftentimes with this set-up I need to use long exposure times, so touching the camera to trigger the shutter isn't a good idea. In the film camera days, I had a cable release for my shutter, but in the electronic age, we use a camera remote control.
Being a digital camera, the photos are stored on an SD memory card. Getting into the tent to remove the card to take to the computer for download was a pain, so my favorite Christmas gift this year was the surprise of an Eye-Fi card, a wireless photo and video memory card. This accessory comes in two parts: one looks like a regular SD card, the other part is the wireless base that talks to the SD card via Wi-Fi. You plug the base into a USB port on your computer, insert the SD card to configure it, then remove the card and plug it into your camera. Photographs are uploaded automatically as taken. I see a little window pop up on my computer across the room to show that data is arriving. I adore this gadget!!!
And one final secret weapon: the background. Photography stores sell backgrounds of all types, from huge rolls to small inserts for tents. For jewelry, a graduated background is often used. An easy way to get a perfectly customized background is to make it yourself. 
I use the gradient fill tool on Photoshop to make a letter size page background, which is usually perfect for my application. I use both linear and radial backgrounds that I print with my photo printer. When one gets a bit decrepit, I just print another. The radial background give the illusion of a nice spotlight just where I want it. 
That's it for the secret ingredients. Next installment will get down to the nitty gritty of camera settings and photography tips.
Wednesday, June 17, 2009
Photographing Metal Jewelry and Glass Beads, Part 1
I've had several people ask for a photography tutorial, so this is the first installment. I certainly don't take the best photos out there, but my images are pretty good for the quick process I use. I have the huge advantage of a husband who has been an avid photography and darkroom hobbiest from youth and loves to buy photography toys.
It's also true that I've made a large investment in photography equipment. As anyone who has investigated professional photography for their work will tell you, it's expensive! One of the reasons is that good equipment is expensive. I've used proceeds from the sales of my work, in particular a large purchase prize for a quilt added to the collection of the Museum of the American Quilters' Society (now the National Quilt Museum) to purchase the early equipment and I've added to it over the years to keep current.
Today, I'll describe the major equipment that I use:
1) Nikon D80 SLR camera body, which is discontinued now (I'd get the D90 probably, if I were shopping now). 
When I used to photograph my huge wall quilts, I had a 35mm film Nikon N50 and then a N80, so this digital 80 was an obvious analog for me to use. I run it in full manual mode, and it has lots more bells and whistles than I know how to use, but a few important things that aren't available on the lower end models (at least not when I was buying).
2) NIKKOR 60mm, f/2.8, macro lens
I've had this since the big quilt days, too, because I needed a lens that could give really crisp, flat images with no distortions. I couldn't get that with the cheap lenses that are often sold with the camera body in a package. I had the experience of projecting slides of 7 foot square quilts and seeing that the edges were out of focus. Then I bought a target poster to look at my lens distortion and sure enough, I had lots of it with the low end lens. This macro lens is incredible; the distortion images were clean; the new ones are probably even better.
It can focus close enough to give a life size image, with incredible depth of field, or give a perfectly flat image of a large target at 15 feet. Unfortunately, it's still a pricey lens. It's a big lens, so the combination of big camera with big lens is really only well suited to the studio unless you're a real photography buff willing to haul it all around.
3) a shooting tent
This white nylon tent diffuses light and controls reflections. When DH came home with the larger model, 30" x 45", I thought it was too big. Now I'm thankful to have it!
4) 250W blue daylight bulbs in reflectors on adjustable stands

These reflectors and stands date from the quilt days, too. I have four of them to shoot big quilts, but for jewelry and beads I only use a pair. Smaller lights would be an obvious choice for jewelry. I have a new set of flashes that Keenan has bought for me, but I've not gotten them in working order yet. These blue daylight bulbs only last 3 hours each, so a substitute would be nice, but they give nice pictures any time, day or night, sun or storm.
5) a copy stand 
My copy stand is an old enlarger from DH's dark room days, but it looks similar to this. In essence, it consists of a mount for the camera hanging lens downward to focus on a small table. The camera is movable vertically by means of a rack and pinion hand crank. Smaller, lighter weight copy stands are available inexpensively, if you're using a small camera, but my SLR plus lens is big and heavy so I'm happy to have the converted free solution.
That's the big equipment. Next installments will detail how I set up the system and a few nifty accessories that I wouldn't want to do without.
Monday, May 18, 2009
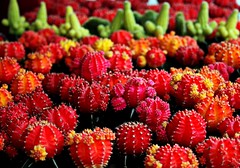
Coincidence of Shapes: Cactus or Pod
I'm back to thinking about cactus today. I have a painted glass tile that has been sitting with my metal clay for months. I've made several attempts at designing a piece to go with it, none of which suit me. So today I'm searching images of cactus for ideas.
This photo is fascinating to me because it ties my cactus ideas of today with the porcupine bead of yesterday.
This photo is fascinating to me because it ties my cactus ideas of today with the porcupine bead of yesterday.
Monday, May 11, 2009
Photographing Enamel on Silver Clay

If you want to see why photographers get big bucks, just try shooting enamel jewelry! I took more than a hundred shots tonight of the new enameled locket, trying to get a photo that encompassed all my requirements for the shot: good color, nice layout, obvious transparency and gloss on the enamel, three-dimensionality, movement, depth of view, etc. All I can say is thank heavens the days of shooting film and taking it for developing before assessing the results are history!
This is the second best image, not nearly as good as my favorite, but an hour earlier in the evening.
This bird locket has been sitting on my table for months, waiting for me to decide how to fill and finish it. I debated keum boo like the last one, but couldn't make myself do it. This weekend I woke up one morning thinking: "enamel it, of course!" When I started to play with setting tiny feathers inside, I remembered the stash of irridescent peacock feathers that seemed just the perfect color.
Now I have a zillion ideas for more lockets. You can see the keum boo bird locket here.
Wednesday, April 22, 2009
Submitting Bead Photographs for Publication


Another of my goals is to submit more photographs for publication. Since I'm so happy with the recent photo of Retro Lovebird, I decided this morning to send it out to the wider world.
My first thought was to submit it to Eye Candy, the gallery page in the Internationaal Society of Glass Beadmakers' quarterly publication. However, the deadline for the next issue was last week and the submissions must be made on CD. Rats! I'll do it anyway, but what else would be more immediate gratification?
Then it occurred to me that I could try a submission to the Gallery in Art Jewelry Magazine. I think of their coverage as more metal oriented, but why not try? They made it incredibly easy, too, with online submission. So away the file went. Now I wait anxiously to see if they think it might fit.
One of the things I noticed when doing the submissions was the request to submit an unaltered image if possible. So now I'm kicking myself, since I routinely adjust light levels on my images and the necklace is in Denver, unavailable for reshooting.
Somehow I've fallen into the habit of shooting my photos without worrying too much about the proper exposure. The focus is perfect, but they are usually dark. I just adjust levels quickly in Photoshop. Now I know I should tweak at the camera. It took all of five seconds to fix. I'm supposed to be a hardware geek, and here I am relying on software!
Here is how I adjusted the photo:
Image - Adjust - Levels (Cntl L) -- I used the slider to set full scale to go from 0 to 165 rather than the original 0 to 255
Of course, adjusting at the camera means just extending the exposure time slightly. I use my camera in full manual mode, and I had to change from 1/15 sec to 1/8 sec to correct the error.
Sunday, March 22, 2009
The Rome Finale
Alas, the time of making things came to an end. Luckily, we had a few days to see the sites in Rome.
I particularly enjoyed the fact that I had just been there two years ago, so I felt no need to see the standard sites of Colosseum, Roman Forum, Sistine Chapel and Vatican, etc. I was free to go for the secondary sites!


Our hotel was perfectly situated, literally minutes by foot from the Colosseum and Roman Forum in one direction and the Trevi fountain in the other, so we did a walk around the first evening after the travel from the villa. We went around sunset, with a full moon rising, so there were some incredible views.


The next day, while the others were doing the standard outings, Carol and I ventured onto the Metro and out to Ostia Antica, the ancient ruins of Rome's port city at the mouth of the Tiber River, some 30km west of Rome. It's somewhat like going to Pompeii. It was a gorgeous spring day, there were people but not huge crowds, and we walked until our feet were sore from all those huge stone cobbles.


On the last day, Carol and I signed up for the English tour at the Galleria Borghese, the incredible early museum of the Borghese collections. Since we were the only two, we got a private tour with a lovely Italian guide who was incredibly passionate about the artwork there. We even got to use the 100 year old elevator that would only hold 3 people, reserved usually for employees and disabled. The sculpture was just magnificent, but again no photographs allowed.
After more wanderings around the city, more gelato (always important), and a few gifts purchased, the trip was done.
Now I can catch up with what's happening at home!
Wednesday, March 18, 2009
Visiting Walled Cities, pt. 2

On our van tour, we stopped for lunch at Monteriggioni, a tiny walled city that acted as a line of defense for Sienna against incursions from Florence. The pappardelle with wild boar sauce was delicious. 
Although we entered in the rain, by the end of lunch the sun had reappeared. 
We continued on to Sienna, where we hiked to the Duomo and had our first of many church viewings. 

Then we visited the Piazza del Campo, site of twice yearly bareback horse races.
I watched Quantum of Solace on the plane home, and recognized the plaza in the opening scene. The piazza is enormous. We were freezing, so we crossed to a cafe in the sun. I ordered hot chocolate. Not what we Americans expect, it was thick, more like thin pudding, and not too sweet (fixable by adding the accompanying sugar packet, if desired). It was warm, though, which was just the ticket.
We peered in lots of shop windows on our way back to the van, enjoying the displays of local goods, such as meat, olive oil and pasta. 
The local delicacy is a richly spiced fruit and nut cake. We tried two different kinds. It was deemed too spicy by some, loaded as it was with ginger, cinnamon, cloves, pepper, and orange.
Finally, we stopped for dinner after dark in Cartona, in the walled section high on the hill. Wandering the streets in the cold led to checking out the cashmere again (several of us had already succumbed to scarves in Sienna). We also wandered through a wonderful antique shop, filled with gorgeous Venetian glass and my favorite, a very old microscope in its wooden case.
I need to return to Tuscany in warmer days and spend hours browsing through all these delightful towns. A one day tour was just far too quick.
Sunday, March 15, 2009
Visiting Walled Cities, pt.1


On Friday, we had a van and driver to take us on a custom day trip. 
First we drove for almost two hours to the medieval city of San Gimignano, which was described to us as the first high-rise city because of its many towers dating to the 11th through 13th centuries. 

The guide books described it as a major tourist trap, so we were warned to consider holding off on too much shopping. Alas, the shopping there was much better than many of the other places we visited, at least for many of the things I feel I mistakenly left behind. I did buy a pocketknife for my son and an original watercolor of the city.
Friday, March 13, 2009
The Villa Lifestyle
I'm home!
Sorry, but obviously my computer access didn't materialize. That's just one of the many things that weren't quite as advertised. Nonetheless, I enjoyed six days to focus on metal clay and the five days of sightseeing.
Here are a few photos of the Villa taken upon arrival and the final day, the only two days there with sun. I can imagine that it would be gorgeous to be in Tuscany later in March, when spring has really arrived. 
The Villa is very remote, about 20-30 minutes walking to the nearest tiny village, Villastrada, consisting of a church, small food market and sports bar. We students had no transportation other than foot, and the pouring rain discouraged venturing out. On two nights when we went out for dinner, we went to the only open restaurant in Castiglione del Lago that would send a car to collect and return us (for a fee).
The main building of the Villa housed the work room on the lower floor, living rooms, kitchen and dining room on the ground floor, two large suites on the second floor and a twin room on the third floor. A second building had four bedrooms, three baths and living room/kitchen on the ground floor and a second complete living room/kitchen with two bedrooms on the second floor. I stayed solo in the minuscule cottage with its kitchen in a cupboard.
The hillside view was just incredible. Nearby, we watched as olive orchards were cleaned and debris burned in every semi-dry moment. The village was also visible across the valley and a lake in the farther distance. The sounds of roosters, wild birds, and an occasional car were punctuated by snatches of Italian from neighboring houses. 

The enforced isolation was good for focusing on clay. Pictures coming soon!
Subscribe to:
Posts (Atom)


