Showing posts with label bronze clay. Show all posts

Saturday, June 04, 2011

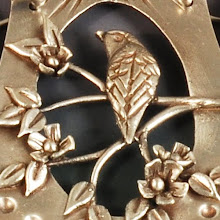
Carving Bronze Clay

Nothing like diving right in, right!? I pulled out a 30 gram package of FastFire Bronze Clay that I acquired last summer to give it a try. My previous carving experiences have been with the original Bronze clay, so I thought this would be an interesting comparison.

The clay was dry and had to be remoistened. I simply sprayed with water, wrapped in plastic for a few minutes, then rolled and folded a few times to recondition the clay to a nice consistency. The lump of clay was too small when rolled to six cards thickness, so I had to drop to five. This is really a bit thin for a piece where I'm going to carve away the center area, but it will do for an experiment.


I traced my tree brooch drawing onto an index card and cut out the opening to form a template, which I used to cut the shape.


Once dried, I roughly sketched in my tree motif with pencil.


Then I went to work carving. I find it easier to keep the work elevated on a rubber block, as it gives me a better angle with the carver. The clay was buttery and easy to carve. However, I found there to be isolated spots within the clay that seemed hard, more copper colored than the bronze clay, and rough. Perhaps these are pockets where the copper and tin powders are not well mixed? We'll see how that looks when it's fired.


Of course, I forgot to practice carving before starting in on the real piece. My favorite practice material is a baked sheet of polymer clay. It pays to get the feel of the tool again before expecting to be able to carve details. Consequently, this piece is pretty rough. Also, the thin layer of clay limited how much relief I could achieve. More would have been better. Now I must decide whether to modify the design by adding my more typical sculpted tree on top. That would add dimension, and be a good experiment in working with this new-to-me clay. I just happen to have another 30 gram package reconditioned and ready to go.

Monday, July 26, 2010

Broken Birds

Alas, the kiln gods did not smile on the bird rings. Last night when I finished the rings and then checked sizes, I decided to carve the shanks just a bit more to enlarge them. Bad idea. Three out of four opened up, and the fourth one has a tiny crack. So the flock going to Purdue is the same five from before.


Now I just need to dream up an idea for using the broken birds in another piece. I can see they all broke right under the head, so I know to carve extra carefully there next time.

Bronze Bird Ring Flock Increases

So many people have asked about bronze bird rings that I broke down and carved another set last night.


The issue with rings, of course, is one of size. And with bronze clay, the size issue is exacerbated because of shrinkage. I should be more scientific, I guess, and carefully measure before and after to analyze the shrinkage. For some reason, I feel unscientific about this, preferring just to get out my circle template, choose circles 2-3 ring sizes larger than my target size, and then cut each one with a different hole. Not that the size stays what I cut, as I carve the shank, making it larger. I notice when I slip them over the ring mandrel afterward that they are not perfectly round any longer (surprise!). That hand-carved look is the point, after all.

Ah ... they are what they are. The kiln gods have them, and each bird will hopefully find a willing finger to roost on, appropriately sized. This makes a flock of nine to take to the PMC Guild Conference.

Friday, July 23, 2010

Bronze Birds of a Feather

They came through the kiln unscathed, that fearless flock of bronze bird rings.


Of course, there is always one that has to fly a different direction.

Thursday, July 22, 2010

Bronze Clay Bird Rings

I hear that Bill Struve will introduce his new fast fire version of his bronze clay at the PMC Guild Conference next week. Thus, I'm trying to use up all my old clay, before I no longer want to work with it. Of course, I still have Hadar Jacobson's clay hanging out and some unopened Prometheus bronze clay and two types of copper clay I haven't touched, as well.


Anyway, since I keep getting inquiries about the bronze bird rings, I carved up a set and popped them into the kiln just now. It's fun to see how they are all similar, yet unique. Offer up a few prayers to the kiln gods, if you are one the requesters, that they 1) sinter and 2) come out your size. I'll be taking them and the other recent one (which was Hadar's clay) to Purdue next week for my table at the Show and Sell.

Saturday, July 03, 2010

Bronze Clay Success

The bronze clay bracelet parts came through the firing just fine, three cards thick and all. Even the slight carving lines didn't split open. It only took six iterations to figure out the wire lengths for linkages, with lots of picking up dropped bits with precarious one crutch positions. On the other hand, the hidden wire clasp worked great the first time. I'd really like to get more reproducibly nice balls on the bronze wire, but I haven't figured that out yet. Some balls are really dimpled.


The carved ring didn't shrink as much as I expected, since I forgot about the difference in shrinkage for Hadar's bronze versus Bill's. (This is Hadar's -- you could tell just by the color of the clay in the previous pictures.)

Monday, June 28, 2010

Sketchbook Diving

Now that my deadline is past, I'm looking for a new project to inspire me after a few days of loafing. Of course, the first place to look is my sketchbooks. It's rather distressing how wonderful ideas get recorded, with much excitement, only to fade into the background as the realities of more pressing obligations elbow in. So it's good to have them on paper, where they can't fade completely from existence. At moments like these, there they are, ready for reincarnation.


The project that caught my fancy of the moment is a very simple bracelet. A nice simple project is perfect after the complexities of an advanced level Master Muse project.

I chose this idea because it involves bronze, and other than the two-day workshop with Hadar, I have avoided bronze for almost a year. For various reasons, including the plethora of formulations bursting onto the market, the frustrations of many artists over unfavorable results, and the dislike I have for wearing protective gear to work, I have put it away until someday. Someday finally arrived, so I donned the Gloves in a Bottle to prevent my hands from turning green and my skin from potentially absorbing toxic copper. I also used a N95 particulate dust mask to protect my lungs when sanding or filing, which I tend to avoid as much as possible. Past experiences with bronze clay have convinced me that my mostly quiescent asthma may flare in response to exposure to bronze dust. I wear protective gear for silver, too, in some circumstances, but the known high toxicity of copper worries me more.


The very simple shapes of this bracelet were accomplished with smooth, thin sheets of clay laid over polymer clay molds of the leaf and flower shapes. It seems almost too restrained, but I need to see what it looks like linked together, I guess. It's also a retry at working thin with bronze, which failed for me previously.


Kiln loading time coming up, so we'll see if three cards thick is too thin. You might notice I had to add another leaf, needing more length to account for shrinkage. Assuming survival through the kiln, these links will be joined with torch-beaded wires, and I'll get to work out the details of the hidden clasp I'm designing.


I also quick carved another bird ring, trying to get the mojo back.

Monday, May 17, 2010

Workshop with Hadar Jacobson

Despite the wheelchair and walker, despite the inability to drive, despite limited utility of the "making" arm, I refused to cancel my weekend workshop with Hadar Jacobson. My angelic husband drove me to San Antonio and returned later in the day to retrieve me, both Saturday and Sunday. He ran up and down the stairs to help me pack tools, searched for the last minute supplies I totally forgot about until time to leave, and even packed drinks and snacks for me.

Hadar is rather an icon in the metal clay community, with a distinctive style of her very own, a beautiful aesthetic that I've admired for years. It was a huge treat to sit beside her for two days, listening to the accumulated wisdom spilling from her soft-spoken lips and watching her worn, stained hands easily forming clay into things of beauty. Although I couldn't afford to purchase the piece of jewelry that called to me (a lucky fellow student took it home), I did so enjoy holding piece after substantial piece, examining the details: design, finish, size. Who knew that fabulous dress was as large as my hand??

We had two main projects in class: copper clay combined with silver or bronze.


The first project involved making copper clay pieces to fire, with holes for later "hot rivets" of silver, torch-fired. I'm afraid my planned earrings are heavy enough to pull my earlobes to my shoulders. I should have made them much thinner and lighter. But I have the concept down, and I can make these into pendants or some such.


The second project started as either bronze or copper clay, deeply textured, then inlaid with the other clay. I experimented with two approaches for the texture, one from my Flock texture, bronze inlaid with copper. I notice that filling around a raised texture leaves the edges open to more erosion during the polishing phase. Obviously there are voids arising from poor filling technique, too. Hadar warned me that my textures were probably not quite deep enough, so I'm happy that it worked this well. I could have polished out more of the roughness, but with a loss of the image, since the copper is clearly thin here. Notes for future applications.


Since I remember liking the carvability of bronze, I tried a simple carved bird on a branch. Let's just say, leaving my Dockyard carvers at home and having limited hand mobility didn't produce anything much. But the concept is good. Better finishing needed, again.

Perhaps the most useful part of the workshop to me was to see Hadar's approach to finishing. We purchased tool kits so that we could use our Dremels to follow her techniques in class. Some of the tools were things I use already, and others I'd read about in her books. Using them her way still seemed different and I'm sure some elements will creep into my later work. Planning ahead for removing material after firing is definitely a different mindset, so I'll have to give it some thought.

It was really nice to feel almost normal for the weekend. Distraction with a fun project took my mind off my leg, but I paid with increased swelling and exhaustion. Everyone was so very helpful in making it possible for me to participate, from bringing me food to ferrying work and materials around for me. An injury does at least make it obvious how many nice people there are in the world. Thanks to all, old friends and new, who helped me have a fun weekend away from my preoccupation.

Saturday, June 13, 2009

Bronze Clay Cuff Success!


It's not perfect, but the second cuff at least is intact and wearable! This is the patina out of the kiln. A coppery color for the front of the bracelet, changing to blue and gold on the sides.

The shape is good. There are a few small cracks to repair.


For some weird reason, there is one spot that is black and appears to have opened up and not to be well fired. Clearly, I need some repairs and a second trip through the kiln.


After polishing, the contrast between the raised portions and the carved background is really nice.


It even fits!

Visions of a carved cuff in silver are starting to dance through my head!

Friday, June 12, 2009

Carved Bronze Clay Ring, Reprised


The second carved bird ring came out of the kiln last night with its coterie of avian themed charms. This is probably the nicest batch of patina I've ever gotten at home -- some lovely blues and lavenders, mossy greens, and muted reds.

Here's the detail of the ring, with the best patina side:


Bird cuff #2 is cooking now.

Thursday, June 11, 2009

Carving Cuff Bracelets from Bronze Clay

I've had a sketch of a bronze bracelet in my sketchbook for months now, and I decided it was time to try it.


For the first experiment I made the cuff too thick, 12 cards, thinking I would carve a lot away. That was more to remove than I realized, and the cuff had all sorts of issues. The major problem was one of cracking during the drying process. Although the clay had been nice and pliable when rolling and cutting, the stress of drying curved around the bracelet mandrel caused lots of surface cracking to appear. I tried filling the worst of these, but carving down into the clay made it obvious that they were much deeper than I could possibly repair. So I expected the bracelet to crack during firing, which it did.

Another issue was one of keeping the bracelet curled around the mandrel properly while drying. I goofed here and lined the bracelet up with the wrong mark, so that it was too big to begin with, and then it opened even further. No surprise, then, that the bracelet is more of a half moon, not even remotely wearable.

I also learned that it's much harder to carve away the negative space for this bas relief -- keeping crisp edges for the design was tricky. I now realize the need for some of the even smaller carving tools, which I plan to order. I had drawn a much more complex image to start with, but it simplified as I worked. ;-)


Even so, this was a great test piece and I learned a lot of valuable information. The firing seems to have been successful. I used a 250°/hour ramp and 3 hour hold at 1500°, with this the only piece in the sink. It was placed in the back of the box and developed some patina (better on the back side, wouldn't you know) with the pattern I've come to expect: red at the top fading to green/blue at the bottom. That makes sense from a physics point of view: the oxide film is thicker at the top, and is reflecting longer wavelengths. I experimented with polishing the highlights, and I will do some patina experiments as well (chemicals shipped yesterday), since that's an area that I as a chemist can really enjoy.


The second iteration is on my table now, carving almost completed: thinner, no cracking, better carving, nice tight fit. Wish me luck. I'm so thrilled with it, I've got butterflies in my stomach over trusting it to the kiln goddess. Sneak peek:

Wednesday, June 10, 2009

Glass Forest at Bead & Button


To break up my bronze intensive at Bead and Button, I took a two day glass class with Kim Fields, know for her realistic depictions of flora and fauna. The class was titled Forest Flora, and over two days we made a collection of goodies you might find on the forest floor: acorns, pinecones, leaves of different types, maple seeds, berries, branches and mushrooms.

We mixed a lot of glass to get more interesting and appropriate colors and had a lot of fun. There were only three students so the teacher-to-student ration was especially good. Kim was just tons of fun.

At Meet the Teachers she did me the extreme honor of asking to trade beads with me. I traded the electroformed swallowtail, hung on a black rubber cord,


for a Vermilion Flycatcher, a bird my DH and I saw outside our bed & breakfast on our recent twentieth anniversary escape. Isn't he amazing (more so when you realize that red glass looks black when it's hot!!)?

Tuesday, June 09, 2009

Obsessions, Artistic and Otherwise

The Summoning Bell for the Muse of Spring is finally completed, strung with simple handmade glass beads, commercial copper chain and a couple of square carved bronze links. Everyone at Bead and Button agreed that it sounded lovely.


The Summoning Bell for the Muse of Winter is similarly finished, but the photo is a bit blurry.


In the vein of following my muse, Catherine Witherell tagged me and a group of other artists to tell what we're about right now. This morning I made a long list of all the metal clay and glass related things I want to do, trying to decide which direction to choose first.

My current mental bandwidth is preoccupied with:
-birds
-feathers
-found objects
-the new garden construction in my backyard
-bird and butterfly attracting plants
-bench and fountain possibilities for the garden
-bronze clay
-bronze patinas
-bells
-painting boxes (cigar, Altoid, other)
-carving -- directly into metal clay or into polymer texture plates
-electroforming copper
-etching copper
-sketching for photopolymer plates or other textures
-planning for teaching classes on glass, metal clay, and electroforming
-bracelet modifications
-a cuff design from my sketchbook (drying now to carve later)
-painting on glass
-brown/bronze as a color
-red (a new interest)
-complexity
-simplicity
-journaling
-getting more done each day
-painting on glass
-using my stringer skills to do some incredible silver clay syringe work
-making some easy beads ;-)
-choosing
-watercolors
-three new books I bought yesterday:
The Creative Entrepreneur
Creative Awakenings
A Whole New Mind
-understanding my personal creativity
-staying cool
-achieving flow

Plus all those random thoughts that fly through my head continuously.

Oops, I had to edit to add that I'm going to continue the game by tagging a few people. Just link back to this post in your post, then leave me a comment so I can see what you're up to (or not -- it's summer, vacation may call).

Monday, June 08, 2009

Bronze Clay Rings at Bead and Button

The other bronze clay class that I took with Celie Fago was a primitive rings class. Primitive in this instance meant simple shapes cut from flat clay and then carved.


Once again, I just adored the carving process. We got to fire two rings each. My first ring was very "Celie-esque," with lots of tribal carving. It's lined with black polymer clay to prevent finger discoloration from the bronze and to deal with the issue of unreliable sizing due to inconsistent shrinkage in bronze clay firings.

For my second ring, I deviated from the prescribed process. I cut out my blank ring in a thick wedge shape, then quickly blocked out the mass for a bird carving. After drying in the dehydrator over lunch, I went to work removing clay with a scalpel. Since I had carved a bird bead earlier in the week, this was a simple extension. I left the carving marks all over the ring, as I was reluctant to invest more time with the unpredictable bronze clay until I saw some success.


Both rings had a beautiful patina coming out of the kiln. I polished the surface, leaving the patina in the depressions on both rings. That was more successful on the tribal ring than the bird ring. Torch patina didn't give me a particularly nice patina on the bird, probably because there was too much mass for the small portable torch. I'm going to do some patina experiments at home soon and have ordered chemicals.

Here are the class samples that Celie made, to compare.

Bronze Clay Charm Bracelet at Bead and Button

I spent a total of 5 1/2 days playing with bronze clay at Bead and Button (there was a little silver clay thrown in there one day). I took two separate classes with Celie Fago, one of my favorite metal clay artists. The first class was a bronze and silver charm bracelet, an involved three day class.

Here's the class example bracelet, with twenty carved flat and round links and 18 different silver and bronze charms.


On the first day, we learned Celie's approach to conditioning bronze clay, cut out links and started carving. We assembled the bracelets and started working on bronze charms on the second day. For the final day, we switched to silver clay for a few accent charms and learned about assembly and finishing.

Here's my bracelet after the first firing. Some of the links opened up, so I added more clay and Celie managed to squeeze the bracelet into another firing later in the week.


After the second firing, there are still a couple of less than satisfactory links.


My bronze charms came out of the kiln looking sickly, like tan plastic. Two of the jump ring attachments quickly snapped, another clue that there was a problem. I was able to easily snap one of those in half, indicating that the clay had not fused properly. These need to be refired at home. Probably the problem was that they were strung on wire (there were a LOT of charms in a class of 25) and not separated sufficiently in the carbon. The feather was made from a polymer clay texture plate carving I did in class. For the bird, I made a two part mold of a simple glass bird bead I made before class, then I carved out more details.


The silver charms were easy to deal with after the bronze trials. I had fun making simple sculptural charms.


Guess you probably noticed I approached the charms with the theme of BIRD. I've got a feather, egg, birdhouse, nest with eggs, and several types of birds.


My biggest take home lessons from this class were:
1) I LOVE carving, both sculptural and surface design.
2) I prefer Celie's method of conditioning the clay and minimizing dust.
3) Bronze is lovely but still a bit of a mystery.

Friday, May 29, 2009

Bronze Clay Bird Link Bracelet


Here's the current version of the bird link bracelet. I'm not happy with the clasp and will replace it, but not until I return from Bead and Button.

Balling up the wires between all the pieces was a pain! Because they are angled, they were difficult to get into position to do the torch work. The bracelet does move nicely though. You can see that it is flexible in all directions, a bit unusual for a flat link bracelet. The wire attachments look more regular when the links are straight out, but I couldn't get a photo of it with my current set up because it was too wide stretched out.

I'll be having a wonderful time!

Thursday, May 28, 2009

Bronze Clay Bell Repair and Bracelet Assembly


The first version of the Spring Summoning Bell has been repaired. It could still use yet another iteration. The clay I added to reattach the inside ring shrank relative to the previously fired clay, opening up some cracks. So it will need another repair, but not until I return from Bead & Button. The bell did shrink some more, but it is still not as small as the Winter Summoning Bell.

The sound of the bell is just beautiful. I'm going to learn how to embed an audio file so that I can put it here in my blog.

The bird link bracelet is all laid out and ready to assemble today. The clasp shrank a bit more when refired, so its size is pretty similar now to the rest of the links, but it is an entirely different color. I'm going to brush and torch patina before the assembly.


Funny, this load of prefired bronze all came out with beautiful patina. I'm thinking that unless the pieces are really well sintered, the bronze just doesn't react to give the nice patina. Is patina itself indicative of how successful the firing was?

Saturday, May 23, 2009

Bronze Clay Bell Progress


No cracks! My attachment of the dome was good. Firing went well. Only one slight problem needing repair: the inside ring attachment was weak. It looks like the bell didn't sinter as well on the inside, and when I was brushing the ring bent over. I will add more clay and refire.

The plate made from the bird tree texture plate cracked open, but I'll repair and refire that, too. Look how much bronze shrinks!!


And all the bits for bracelets and one pendant came through well. The clasp didn't seem to shrink as much as the original pieces, perhaps because of the opening? I will refire it again as well, to check shrinkage. I do think the small ovals will be enough to extend my bird link bracelet to a wearable length.


I didn't get much patina on many of the pieces in this load. It appears that the only real patinas, rainbow vertically, were near the edge of the container. The big flat plate is the best example. I have a theory that some oxygen is needed to get the patina, which makes sense, since I know scientifically those patinas are oxide layers.

Friday, May 22, 2009

Bronze Clay Bell Construction


The Summoning Bell for the Muse of Spring went together pretty easily this round -- I must be getting the hang of this!

The hardest part is getting the top section domed. It's a pretty tight curve, and requires some finessing to fit the disc over the mold. This one had some fine cracks that I hope were well repaired.

I used larger rings for the top and inside, which made those attachments seem straightforward.

Now I'm ready to remake Spring with nests in place and get going on the Summoning Bell for the Muse of Summer. Summer in Austin is almost here!

I also sanded and drilled a bunch of bracelet links to maybe continue the bronze bird link bracelet that has stalled. I hope to get the kiln running today!

Wednesday, May 20, 2009

Texture Plates for Metal Clay

After using Barbara Becker Simon's hand-carved texture plates, I just had to give it a personal try. I rolled out a sheet of polymer clay on the thickest setting with my pasta machine, sandwiched it between two sheets of glass, and baked as directed in my dedicated toaster oven.

Then I pulled out the U-shaped micro-carving tool from Dockyard and started playing. The first plate got mostly doodles, but the second plate got a bird-on-a-branch scene. The polymer clay carves like butter.


Since I had bronze out and handy, I pressed it into the plate to see how well the detail came out. I need to carve a bit deeper in some areas, but mostly I'm thrilled with this first attempt. I'm thinking it will probably turn into the lid for a box or a plate for the front of a book. And I'm thinking I need the different size tools as well!