Showing posts with label glass. Show all posts

Thursday, September 20, 2012

Inspiration from Australia 1

A month away from the blog is the longest I've ever gone quiet. Among that time was a twelve day trip to Australia, tagging along with my husband who attended a conference in Perth and then continued to further business in Melbourne. The last time I visited Australia with him, I had a twelve year old home schooled boy in tow, so all my tourist activities were geared toward entertaining and educating him. This round, I focused on my own interests, visiting gardens, museums and galleries.


The work that most amused me during my outings was the glass art of Richard Clements, whose delightful bird sculptures fascinated me when I visited Kirra Galleries in Melbourne.  His "animals of unknown origins" were at once whimsical and masterful, mounted on the wall at eye level.

"Animal of Unknown Origins"
Richard Clements
via Kirra Galleries
Kirra also displayed work by another glass artist that I've long admired, Kristen McFarlane, who specializes in layering images and text on glass. Indeed, if the prices on everything in Australia hadn't seemed to be twice what they are in the United States, I might have brought home a small piece of hers that particularly caught my eye, set as a diptych blue daguerreotype.

Kristin McFarlane
via Kirra Galleries
Amongst the flame work included in the special exhibition I viewed that weekend were plenty of jewelry pieces, including typical beads. The most intriguing jewelry work was that of Terri Kraehe, whose necklace based on eucalyptus pods was simply stunning (and already sold). 

eucalyptus pod neckpiece
Terri Kraehe and Marianne Kerby

I find that although most of my recent work has been silver, I am still enormously drawn to glass. As I try to analyze directions for future work, I came away from this trip convinced that I need to somehow combine my glass and metal interests to produce work that is truly representative of my highest ideals. Now I just need to find time to explore the possibilities!

Tuesday, March 27, 2012

Matching Clasps to Necklaces

Sunrise Birdwatching
©2012 Vickie Hallmark
lamp worked glass, sterling silver, fine silver
One-of-a-kind necklaces deserve one-of-a-kind findings. The first Birdwatching necklace I assembled used an off-the-shelf toggle closure, but I knew I wanted something more fitting. One day I noticed the bird and birdhouse toggle I'd made for a workshop proposal on clasp design. All this time it was right in front of me.


Sunrise Birdwatching, detail
©2012 Vickie Hallmark
lamp worked glass, sterling silver, fine silver

Thursday, October 06, 2011

Glass Breakage!

That’s what I get for bragging on my technique for embedding glass into silver. I’ve never had cracks before, but here they are, right after I opened my big fat mouth.
Sunbird Necklace
Yesterday morning I took photos of the pendant and all was well. As I was constructing the necklace to hang it, I noticed a flash of color from the glass that made me pause. It appeared to be a fine crack starting from the back of the glass and propagating toward the surface.
Sunbird Crack
As the day wore on, the crack propagated, and more formed. There are multiple possible causes.

  1. Perhaps the mounting in this case was too tight. I left a bit of space all around the edges, as usual, so I suspect that’s not the cause.
  2. The back of the pendant was not completely flat, because of deformation caused by the bezel cup on the front. When viewed from the back, there is actually a depression where the cup is attached. I believe it’s more likely that non-uniformity of stresses across the glass could cause the breakage.
  3. Finally, I did some things differently in the enamel on this painting. Specifically, the enamel is much thicker than usual. Because the cracks really appeared to emanate from the back surface of the glass, where the enamel was applied, it makes me think this may really be the issue.
So, you can be sure I will be much more careful in the future, as I try to figure out these factors. Meanwhile, I’ve looked up the tricks of the trade for “healing” cracks in glass. It seems that windshield cracks are often mended by applying a resin to the surface, so I will see if a clear resin coat here will make the cracks less apparent.

Wednesday, October 05, 2011

Completed Freeform Glass and Silver Pendant

Yesterday I assembled the pendant and fired. Today I brushed up the silver and added a dark patina and set the labradorite cabochon. Next, I’ll be adding some special details to the necklace from which the pendant will hang.
sunbrid frontsunbird back
For those near Philadelphia, I believe there is one seat left in my upcoming two-day workshop, October 14-15, where you could learn all the details of the techniques I used in this pendant. It’s easy and fun and offers unlimited possibilities for adding color and personalization to your work. Contact Holly Gage for details.

Monday, October 03, 2011

Freeform Glass & Silver Pendant

As I mentioned, the new pendant has a different design process. The silver box form that holds the glass was formed first.

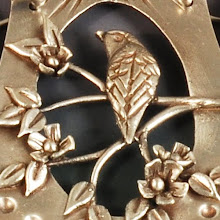
Then the front of the pendant was textured with tear-aways on both sides, and the hand-sculpted bird and branch were applied over the top. The bezel cup will hold a 10 mm cabochon.
Vickie Hallmark sun bird pendant glass enamel silver clay components
Only after the components were complete and fired did I trace the box form onto glass. After cutting and grinding to a perfect fit, I applied the enamel design to coordinate with the sculpted branch.
After assembly the pendant will be complete. This one called out for a very different necklace design, so I fused some Argentium rings onto the corners for attachments.

Wednesday, September 28, 2011

Developing a Jewelry Design

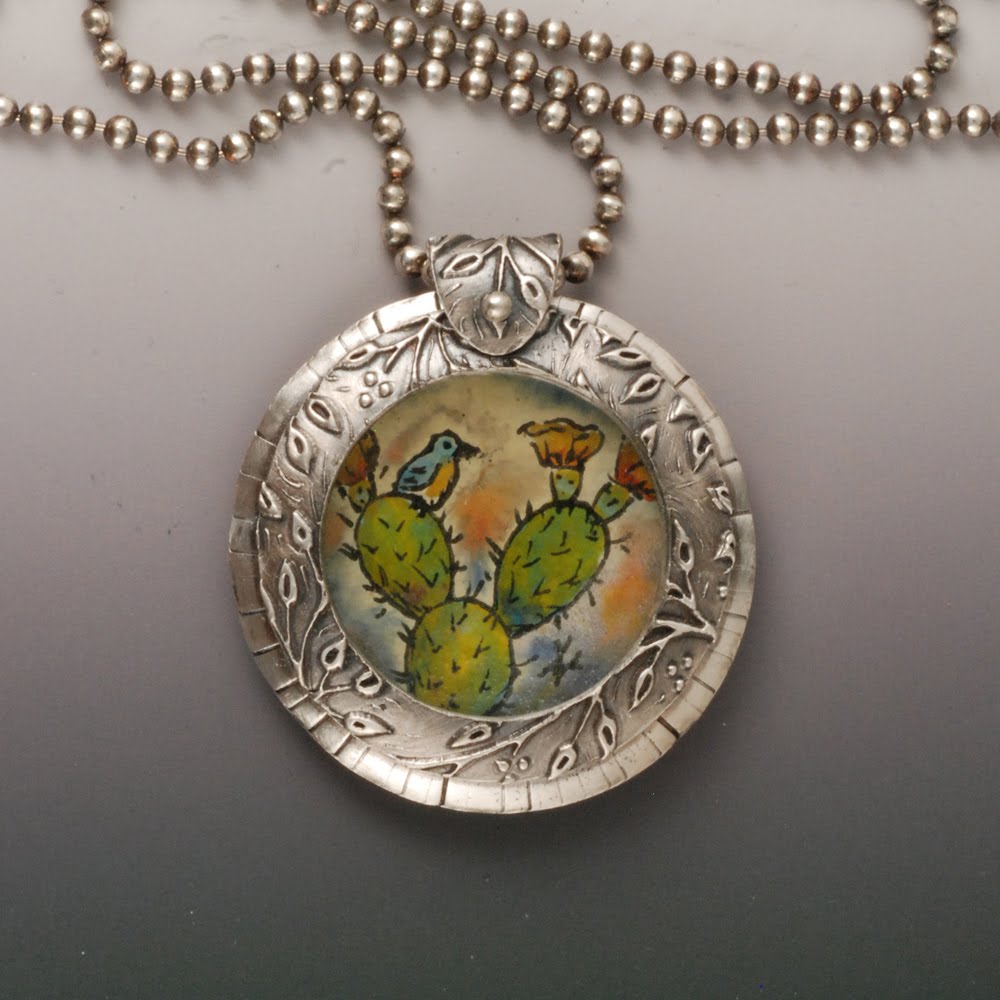
As I work with glass and silver recently, I'm consciously trying to move the designs forward. Originally I worked with rectangles of glass, since that's the easiest to cut. I combined these with flat mountings at first, then incorporated more decorative elements to go into the third dimension. Last week I finally moved to circles of glass, always harder to cut and grind, especially when they are tiny. I also tried a new setting, using a traditional lentil construction.


This week, I'm going more free form. I've flipped my process around, making the setting first this round, whereas I usually paint and then design a mounting. It allows me a lot more freedom, as I can do the sizing perfectly the first time with no shrinkage calculations. And I can integrate the design of the setting with the painting, as here where the branch design is part silver 3D sculpted on top and painted glass in the background. It reminds me of my quilt designs where I would flip color values at borders for more interest.


I've gone back to drawing in my sketchbook as well. These two drawings show the evolution of the latest pendant design. I started out with a triangular shape with an offset opening, then in the process of drawing in the texture, I realized I should make the silver and glass work together. So I drew a new version incorporating that idea. The setting was cut and refined easily. Now I need to cut the glass and paint it to assemble tomorrow. Stay tuned.

Monday, September 26, 2011

Art Making Requires Stubborness

I just thought that the studio gremlins had retreated after I vanquished them over the last Garden Window glass and silver pendant. My idea for a new mounting seemed much simpler, but didn't prove to be so.

painted vitreous enamel on glass set in silver pendant by Vickie Hallmark

How many issues were there?

  1. Shrinkage. I calculated based on diameter of the glass disc insert, but didn't account for the thickness. 
  2. Breakage. I tossed the front piece onto the floor going out to the kiln. Three pieces from one!
  3. Poor workmanship. One repaired seam held; the other did not.
I made three glass tiles and two silver mounts before finishing one piece. In effect, it's just a lentil with glass in the center. The simplest of the simple, right? 

back of painted vitreous enamel on glass set in silver pendant by Vickie Hallmark

The glass slumped to fit the curve of the back piece, so it has a nice hollow feel to it. Good thing I did not put it in the kiln upside down, or there would have been a fourth item on the list above.

Thank you, studio gremlins, for finally caving and letting the work move forward. I credit them with having a heart as my birthday hour neared.

Tuesday, September 13, 2011

Back to Glass with Silver

I have a stack of enamel-painted glass tiles stashed in a drawer for the day when I make new silver mountings for them. Yesterday I cut and formed the metal clay pieces for a new pendant, and today I did a lot of detailed sculptural details on the front -- nothing fancy, but vines, leaves and bezel cups for cabochons. Tonight as the kiln is clicking away, I'm pondering the options for the glass to mount inside.

hand-painted vitreous enamel on glass

There are three types of enamel paintings here. One tile has just the black tracing. Several are reverse painted on clear glass with a coat of white on the back. The others are painted on the front with different enamels. The reverse paintings on clear are more vibrant, but they tend to react more with silver. Which to choose?

This is the technique I'll be teaching October 14-15 in Pennsylvania. One full day will be playing with the various enamels on glass. And the second day will be constructing a setting for one of the glass tiles. There are still seats available. Holly Gage has more information.

Monday, April 11, 2011

Glass Bird Vessels Revisited

In anticipation of attending the ISGB Gathering this summer in Louisville, I'm thinking about what I might offer for sale at my half-table during the Bead Bazaar to offset expenses. Last weekend when I was at the torch, I decided to see if I could construct a bird vessel, a task I haven't attempted in probably two years.


I admit to cracking the top once and healing it, which was always a problem with these large pieces that take a lot of time. The hollow blowpipe sucks heat away from the glass, meaning a constant bathing of that area to keep from over cooling. My wings aren't as well-defined as I would like, but I take the fact that I could get this close on the first try as a very good sign. I'm not clear about the reason for the devititrification on the body, but actually wondering if I added in some silver glass by mistake from the mess on my bench.

Now to try some electroforming again. It's embarrassing to admit that my equipment is still packed and unused for almost a year.

Tuesday, April 05, 2011

Ring a Week 14/52 -- Glass Bird Rings

And now for a little diversion. My DH and DS went to an airshow over the weekend, leaving me home alone with my art supplies. I spent a lot of time on the torch, since I haven't been out there much over the last year. I got to try out a lot of experiments from my idea stash. The foremost was to make a glass ring to keep up with the Ring a Week challenge.


Several weeks ago, I bought a large round mandrel that I thought would be big enough for a ring. My idea was to sculpt a bird ring, similar to the bird rings I carve out of bronze. Glass, of course, is a different beast. But this was the first experiment. The hardest part was to get the glass (semi)evenly deposited onto the mandrel in a ring. I decided I needed to work right at the end of the mandrel, where I had the edge to guide me, rather than in the middle of mandrel, where my wrap didn't exactly meet up -- that was a seriously jogged first ring! This first effort is rather simplistic, but it shows that I can make it work.


I ground out the inside of the ring to remove any sharp edges. It fits quite well on my size 8 forefinger. How sturdy it is? That is the question. I guess I need to wear it around some to see how it takes knocks. I made the bird fairly stocky to avoid weak glass points on the beak, wings and tail.

Since I only have the one mandrel this size, it's a one ring at a time experiment. Next round, I'll get a bit more elaborate.

Sunday, March 06, 2011

Published! Glass Artist Profile in Bead & Button Magazine

I was thrilled to be approached last fall by editor Ann Dee Allen of Bead & Button Magazine regarding a profile of my glass work. Sheila Llanas interviewed me several times via phone and e-mail, and I shipped some representative beads and vessels to her to inspire her writing.

Finally the wait has passed and I can announce that the profile has appeared in print, in the April issue of Bead & Button. Sheila did a terrific job of distilling my scientific background and experimental approach to art into background for the article.


The photographers at B&B also took advantage of the beads and vessels I sent, along with my own images, and a bead from the editor's collection to illustrate the article.

BNB110401_500

Quick, run out and find the latest issue, which has a beautiful bangle project by Cynthia Rutledge along with other fun bead projects.

Wednesday, February 16, 2011

Workshop with Sara Sally LaGrand

Last Friday I got to escape to the torch for a full day at a workshop with Sara Sally LaGrand. The topic was silver glass reactions, which those of you who follow my tribulations with that glass understand to be of particular interest to me.


I couldn't resist bringing home a couple of Sara Sally's corsage brooches. This white one, named Tilda after the wicked white witch from Narnia, seemed so nest-like to me somehow that I couldn't resist adding it to my bird themed collection. Probably it's the wispy real feathers peaking out or the spotted glass feathers that brings that feel to me. This one is quite large, hand-size, so I don't think I'll likely wear it, but simply nestle it alongside other pieces from my collection.


Glenda, the good witch from Oz, on the other hand, is small and quite wearable. I loved the complementary orange and violet color palette. And that dashing little orange feather has just the perfect in'souciance.

As for the silver glass, as I was coming to suspect, the upshot seems to be that my mini-CC torch runs much hotter than a Minor, and thus I wind up overheating the glass far too often. Better results were had when I worked much cooler, but even then it was hard to get a good encasement on a large bead without pushing the glass to mud. More time to move glass slowly is needed.

I wish I'd been able to squeeze into her two-day corsage class, since these look so fun to make. I just have to be grateful to have found an opening in the reactions class.

Meanwhile the flu drags me down, so I have yet to complete my Ring a Week #6. Cough, cough...

Saturday, October 16, 2010

Birdwatching Beads

Heat control is critical when making beads. Finesse is needed to apply stringer (thin glass rods like angel hair pasta) slowly and carefully, keeping it raised, not melted into the surface. Then that applied stringer needs to be kept warm enough to keep it from popping off while other surface decoration is being applied. Thin areas of certain bead shapes, like the smaller end of these cones, are prone to cracking if not enough heat is applied, while it also takes less heat in those areas to melt the stringer in. There's a narrow window of tolerance.


Different glasses react differently in the flame. Some are prone to boiling if overheated. Some are shocky and dislike sudden thermal changes. Certain colors react. Silver glass will fume the surrounding glass if it is reduced, meaning the flame has more fuel and lower oxygen.

There's a lot to know. And knowing is different that being able to do it without thinking. Five months off the torch means that I have to remind myself of things that should be second nature. Practice, practice, practice is required. Slowly, I'm approaching the point of being able to do what I want without so much talking to myself.

It's like teaching a child to read. At some point that laborious sounding-out of words becomes recognition, and a reader is born. Then after years of building skill, the teen can read Dickens.

Thursday, October 14, 2010

Silver Glass How-To, Part 1

Silver glass is the latest rage in expensive supplies for lampworkers. At $50-100 per pound, it's something you want to use wisely. Unfortunately, unless you know the tricks, it can look like scrap glass.

I have invested in a variety of such silver glass, mostly from Double Helix Glassworks and Precision 104, made by Northstar, although there are other choices as well. After having some success and more failure with working the silver glasses in my stash, I finally decided to become a bit more systematic in my study. Five months off the torch will do that to you. Did I really believe that I would remember what I used for certain beads??? Or exactly how I handled the glass to get that cool effect instead of mud? Alas, I stand corrected.

Here's my first pass at preparing samples. I made three small spacer beads of each glass, one left plain, one reduced, one reduced then encased.


Top to bottom: Psyche, Michelangelo/Sasha's Silver, Ekho, Kronos2, Aion and Nyx

Of course, now I've been reading up a lot more on silver glass, so I know that I need to do even more experiments. I also need to make samples for other colors in my stash. Stay tuned.

Monday, October 11, 2010

Glass Mojo

I claimed a few hours on the torch from a busy weekend, to try to recover a bit more glass mojo. My stringer control is getting better. I just played around with wrapping the ends of beads, laying down branches (one direction is much easier than the other) and shaping leaves and birds.


Who could believe that I'm out of opal yellow glass??? I have drawers full of glass, but only one solitary rod of the beloved opal yellow when I went searching yesterday. Four beads it is, with opal yellow cased on a clear core. All the time I had anyway. I guess I need to return to organizing the glass stash. I did a whole drawer of pinks and one of silver glass last weekend, but none this time.


Sunday was spent experimenting with ceramic clay. I haven't played with that in many, many years, so it was interesting to try again. It did give me some ideas for new things to try with metal clay. It's useful to have an inexpensive alternate for testing purposes. I brought home a slab of clay to make a bunch of stamps and molds. It's good to have a friend who teaches high school art, with a specialty in ceramics. I forgot to get a photo of the small wish-keeper I constructed. Think of a small box with lid, with holes for stringing together. At the end I constructed a small hollow bird. I didn't have time to carve that one as I wished, but I'll make another at home now that I have the process down.

Friday, August 13, 2010

Another Glass and Silver Box

I didn't post this one before I left for the PMC conference, because it was finished at the last minute. It's the second version of my glass and silver box. Unfortunately, I didn't quite place the inside rim of the lid properly, so it doesn't fit perfectly. Now I need to make another box for this lid and another lid for this box.


I love all the original drawings on each side, and that there is a favorite quote hidden inside.

It is not only fine feathers that make fine birds. --Aesop


You can see the Master Muse synopsis of the tutorial for this box here.

Wednesday, June 16, 2010

Being a Teacher at Bead & Button, Class 1

Wednesday was a rough day for me, starting at 6:30 am when I ferried myself on my electric scooter over the roller coaster skyway from the Hyatt to the convention center, followed by my husband pushing a laden cart and my wheelchair. My classroom was in the far back corner of the show floor. Luckily, no carpet made pushing myself around in the wheelchair easier, because I proved myself reckless while trying to rearrange tables and chairs pushing from the back of the scooter. No further bodily damage ensued, thank goodness!

Soon we had the aisles wide enough for me to zip through, electricity wired in for all the power equipment, and all the boxes unloaded into a huge mass of supplies. My Garden Window class is a very tightly timed class, as we run the kiln four times to get the pieces all finished. I literally have a printed timeline that I consult to make sure we're staying on track. There are a few things that I typically get done before class starts that I didn't this time because of the extra room rearrangement, so I felt behind even before I started.

I, and especially the students, were extra lucky to have superstar Gordon Uyehara volunteer as my assistant for the day. Thanks, Gordon, it would have been much tougher without you!
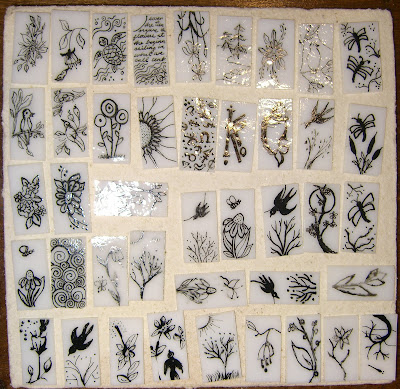

First we drew the black outlines onto glass and fired the tiles.
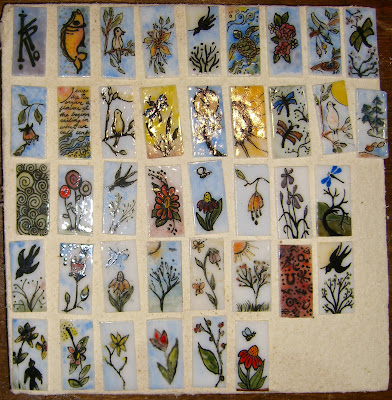

Then we added color and refired. Talented group, aren't they? Everyone loved the glass painting part of the class. I think they could have spent all day doing just that part, so I'll have to rethink whether or not to change the class for next year.

By late morning however, we'd changed to silver clay so that I could show how I make my box design to hold the glass. I carefully loaded two shelves of silver into the kiln during lunch, without double checking the position of the thermocouple. Unfortunately, I blocked it, so the top shelf got hotter than desired. Chalk one disaster up to moving too quickly!

Some pieces had the dreaded (or loved) glitter effect that comes when the temperature is pushing dangerously close to the melting point, but not so much that a brass brushing wouldn't resolve the texture. A couple of box backs were so glittery as to loose all texture. And one lonely, thin front window melted into a complete puddle. I now know where the hot spot in my kiln is located.
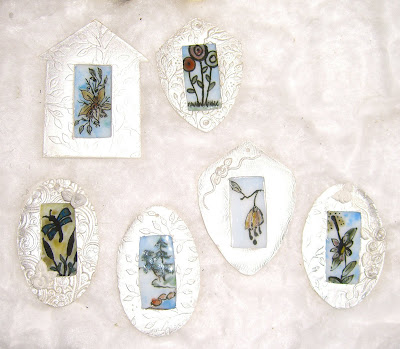

Luckily, my victims were good sports and the worst pieces were replaced with my prefired sample pieces to continue on with the process. Several students took their pieces home to fire, so I can't show them all. These six all turned out quite nice, and will be even more lovely after patina and finishing.

As soon as class ended, we rushed to pack and vacate the room in the one hour allotted before the next class started. We hauled everything back to my hotel room, dumped everything, and I collapsed with my throbbing leg elevated. After an early dinner, we reloaded jewelry, books, business cards and postcards, and headed back to set up for the Meet the Teachers reception. Because of my accident, I didn't get a chance to make the things I'd planned to take for sale, but I did luckily have the earrings from my Month of Earrings Challenge. My table wasn't completely bare!

I didn't sell a lot, because I didn't have components, tools or kits available for this crowd of make-it-themselves types, but many people seemed interested in the classes. My textures got a lot of interest, so when those become available, I think they will do very well.

The reception ended at 11 pm, at which time we repacked again, toodled back to the hotel, stood in a long elevator line to transport both the scooter and wheelchair up to the room, and then collapsed into bed. I can only be thankful that I didn't get the two classes on consecutive days as I requested, but I had Thursday off so that I could sleep in the next morning.

Tuesday, June 15, 2010

Being a Student at Bead & Button, Class 2


On Tuesday I joined 24 other students in Robert Dancik's "Concrete: It's Not Just for Sidewalks Anymore" workshop. Again I got into the sawing groove and did a pierced bird on a branch for the reverse of my folded copper box. I set a hand-painted enameled glass tile into the concrete rectangle, then suspended a mabe pearl in the triangle below. I loved the look of the black iron wire echoing the black enamel, as well as the contrast of the roughed up concrete texture with the smooth glass and pearl. I'm going to do more with this concept.

Wednesday, January 13, 2010

Beads Published!

I finally made it through my box of mail stashed from my trip, and found buried treasure -- my copy of The Flow magazine.


For the fifth year, this winter issue showcases the Gallery of Women in Glass, with some of the most stunning work in glass beads, marbles and sculpture. Three of my electroformed and painted-enamel beads are included on page 8.


I recommend a subscription to check out the eye candy regularly, but you can order individual issues from the publisher or check at your local glass shop to see if they carry this fine magazine.

Tuesday, October 27, 2009

More Bird Tree Beads

Over the weekend I squeezed in a few more bird tree beads. I'm experimenting with different base colors and finding that many of the colors I'd most like to use react with the silver glass. They all turn out looking "golden" like the two on the right, although they might have been rose or lavender to begin with. I tried etching another one back, only to find that the silver glass looks a surprising dark blue purple if etched down very far (not far enough to remove the brown, of course).


CIM Celadon, however, stayed true to color. I love this color, but hate how shocky the glass is. This time, as I turned on the kiln, I thought to pop a rod in and was able to use it rather than just having the end repeatedly shatter.

I'm prepping for a metal clay with glass class on Saturday and my son's sixteenth birthday tomorrow, so more glass beads will have to wait until after Halloween. Time to get serious and just do color tests first.