Showing posts with label bracelet. Show all posts

Tuesday, April 15, 2014

7 Leaf Cuff in Progress

The most popular item on my display during both wholesale shows earlier this year was the 7 Leaf Cuff shown below. I thought it might be interesting to show how this bracelet is made.

7 leaf cuff
Vickie Hallmark

The right and left curving leaf master models were made by hand in sterling silver metal clay, with my signature leaf vine texture. After firing in the kiln in two different stages as high as 1500ºF, the pieces are reduced to sterling silver. After polishing to provide the best surface, they are soldered to metal attachment rods called sprues and then molded with heat curing rubber. The rubber molds are cut open along the edges to remove the masters and then wax is injected into the molds repeatedly.


7 leaf cuff components
These wax copies are attached to a center wax sprue to form a tree of waxes, which is then molded itself in silica based investment (like hard plaster). After burning out the wax in a hot kiln,  Argentium silver is melted in a crucible at the center of a centrifugal casting machine, the mold is place at the end of a long arm, spring wound to spin freely. When the metal is melted, the crucible is pushed up against the opening to the mold and the spring is released to force the metal into the void in the mold. After cooling, removing the investment, cutting the pieces apart, and minor polishing, the pieces are ready to assemble, as shown above.

7 leaf cuff fused flat
Each leaf is dipped into flux, carefully positioned with its neighbors in a long line, and then each joint is  fused together without any solder. The bracelet is ready to form around a mandrel and heat harden (a specialty feature of Argentium) to maximize its strength before it is polished and patinated to bring out the texture.


Monday, December 09, 2013

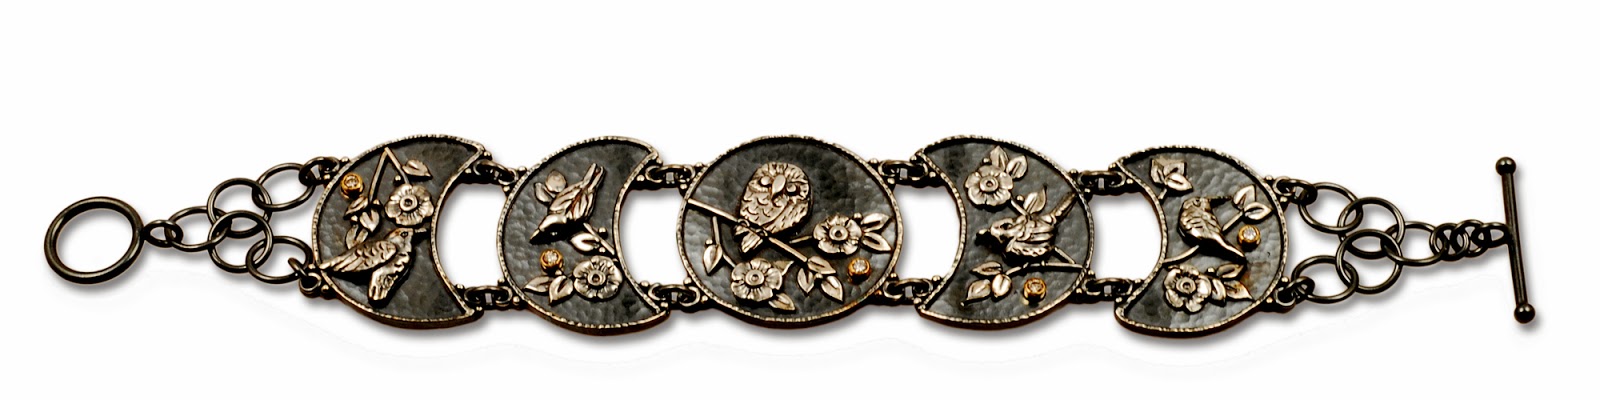
Australian Moons Bracelet

Australian Moons bracelet
©2013 Vickie Hallmark
Argentium sterling silver, fine silver,
18k yellow gold, diamonds
Completely handmade from Argentium sheet and wire, fine silver clay, commercial gold bezels and Mother Nature's diamonds.


Carrying on from the first part of the construction, I cut out the fused panels and finished the edges and backs. Then I soldered the gold bezels into position and a little surprise on the back (I like to add a hidden treasure for only the owner to see).


Next, I fabricated the chain links and toggle clasp from Argentium wire. All the large links are fused, but the small jump rings were soldered closed for security. After patina and some polishing, I set the diamonds into their bezels before final touch ups.

Voila! It seems so easy to run through the steps in writing, but in the real world this is hours and hours of painstaking work. That's what's required to get the level of detail that I like and that my customers appreciate.

If you'd like a custom piece of your very own, use the contact form on the rights side of this blog page to contact me!


Friday, November 29, 2013

Australian Moons Bracelet Fabrication Part 1

I love my Five Moons Bracelet design, but I wouldn't ever want to reproduce it exactly. When I received a request to make a custom version, I thought it was a perfect idea. All the quirks of construction are already worked out, and the fun part of designing the one-of-a-kind vignettes on each panel are the excitement.


After working on the birds in fine silver clay, and amassing a pile of tiny leaves for the branches, I started to work on the panels themselves. This time I used a ball peen hammer to texture the sheet for the moons, meditative work that needs to be undertaken with proper attention to prevent damage to the body from repetitively raising and dropping (not actively striking) a hammer thousands of times.  I also formed the wire rims for moons and textured those with a fine linear hammer. Prep work like this takes longer than you think.


Then the fun began, as I bent tiny bits of wire to form branches, carefully dipping those and the silver leaves into flux (not too much, not too little), before placing them into position. Each bird is different, because I want each panel to have its own character. Some branches start from the top and others from the bottom. Some have the bird facing up and others down. Flowers and tiny berries appear amongst the leaves. The client requested some gold and to incorporate diamonds, so I added 18k yellow gold tube bezels strategically, one per panel.


After I was pleased with vignettes (I let them sit overnight and check the next morning to see if anything looks out of place), I formed a pile of tiny jump rings from wire to add the connectors on either side of each panel. These are carefully glued into place with more flux and tiny granules which add a decorative touch, but also reinforce the connections which do all the work. I also got carried away with tweaking things that bugged me, such as the owl, which was split to allow the branch to appear in front. Because the owl was thicker than the branch, it just looked wrong, so I had to remove some thickness from the pieces. Slightly burned fingers from holding the two bits against a belt sander did the trick. And then I couldn't resist adding bigger eyes for the owl and extra tiny claws to a couple of the birds as well. This is the part I love about the work - elevating the details to the next level.


Once the flux is dry, off to the torch goes each panel. This is the most nerve wracking part for me, as the flux expands as it heats up, often pushing these tiny bits out of position. So I sit with a torch in one hand and a pick in the other to carefully reposition everything that might have moved (and the flux only allows movement when it is hot). Then I take the temperature on up to the fusing point and carefully rotate the piece to check that every last free part actually attaches firmly together. Heat control is critical. Too little and something may pop off later. Too much and melting can cause me to remake the entire piece.

Whew! What a sense of relief when these are all fused! Now comes the required, but less fun, more tedious part of finishing the bracelet with connections and clasp.

Wednesday, December 05, 2012

Bracelet Shows Opens Tomorrow!

The Fourth Annual Bracelet Show at Kathleen Sommers in San Antonio will host a reception with the artists tomorrow. If you're in the area, please come see more than 100 bracelets by over 60 artists. You can get in a little holiday shopping (and of course they carry lots of merchandize beyond the bracelets), as well as support a good cause. Ten percent of the proceeds go to the scholarship fund of the Southwest School of Art. I'll be there to revisit my Five Moons bracelet, which I shipped off immediately after finishing it.  Since it's long and doesn't photograph well, here are some detail shots to give a better view.

Five Moons Bracelet (left link)
©2012 Vickie Hallmark
Argentium sterling and fine silver
 fused, fabricated
Five Moons Bracelet (center left link)
©2012 Vickie Hallmark 
Argentium sterling and fine silver
 fused, fabricated
Five Moons Bracelet (center link)
©2012 Vickie Hallmark 
Argentium sterling and fine silver
 fused, fabricated
Five Moons Bracelet (center right link)
©2012 Vickie Hallmark 
Argentium sterling and fine silver
 fused, fabricated
Five Moons Bracelet (right link)
©2012 Vickie Hallmark 
Argentium sterling and fine silver
 fused, fabricated

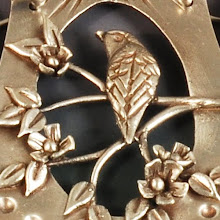
All the birds, flowers and leaves are individually sculpted by hand from fine silver clay and then kiln fired. The individual links of the bracelet are completely hand fabricated from Argentium sheet and wire, and then the sculptural elements are fused into place. Even the chain and toggle clasp are all completely hand fabricated. Truly a labor of love!

Five Moons Bracelet 
©2012 Vickie Hallmark 
Argentium sterling and fine silver
 fused, fabricated