Showing posts with label silver clay. Show all posts

Monday, November 28, 2011

Earrings Old and New

Finally today I was able to finish up some earrings hanging out on my work table. First up is a new design, with a domed oval set into a flat frame. Called Nesting, these earrings depict a parent bird and a hungry nestling in the treetops.


This design is an extension of my favorite Meadowlark earrings, which incorporate that flat window frame with sculptural branches and birds. I've sold several pair of the Meadowlarks, each set one-of-a-kind with different birds and branch configurations. This is the design I choose to wear myself, day in and day out as I think it represents my personal imagery at its very best.


I'm trying to extend the concepts that I like the most about the Meadowlarks to make a larger collection of earrings, since I want to try approaching galleries about carrying my work. Meanwhile, both sets of earrings will be available in my Etsy shop, in case you're looking for a special gift for someone on your list (or yourself!).

Monday, October 17, 2011

Glass Painting and Silver Clay Workshop at Gage Designs

I'm home from my weekend in beautiful Pennsylvania, where I led an exploration of painting on glass and setting glass into silver clay. The class of ten students did some beautiful work. Unfortunately for me, despite sitting in the charger for weeks (evidently unplugged), my camera battery was nearly dead. Luckily, Holly's camera worked!

Enamel on glass paintings by Holly Gage (two on left reverse, others surface)
The class learned two types of painting on glass: surface painting onto an opaque white glass with watercolor enamels and reverse painting onto clear transparent glass with opaque enamels. To appreciate the detail achievable in the paintings by the talented Holly Gage, you need to know that the glass size is 5/8" x 1 1/4"!
Enamel painting on glass
Top, L to R: Helene Richards, Karen Quirk Douglass (2); bottom: Kimberle Gage  Swanson
I also demonstrated my method of setting the glass in silver by pre-firing components and then firing the assembly with glass inserted.

Dorothy Thompson - painted enamel on glass set in fine silver clay
Unfortunately, I didn't get photos of all the work, but these photos were all posted by Holly Gage.
Enamel painting on glass set in fine silver clay
Karen Quirk Douglass
Painted enamel on glass set in fine silver clay
Terri Werner
Can you believe that this wonderful owl pendant was the first metal clay project ever for Terri Werner??? While Terri was a bit intimidated by the skills of her fellow students, I think this is a simply stunning piece!
Enamel painting on glass set in fine silver clay
Kimberle Gage Swanson
This beautiful pendant was designed and executed immaculately by Holly's sister-in-law, Kimberle Gage Swanson, obviously talented in her own right.

Enamel painting on glass set in fine silver clay
Christine Miller

Enamel painting on glass set in fine silver clay
Helene Richardson

It was a great trip. The students were fun, enthusiastic and productive. Holly did an amazing job of preparing and assembling supplies. She and her family also welcomed me into their home, where Holly shared her studio and supplies with me for late night play sessions, while her husband pampered me with gourmet meals (pumpkin lasagna!!) and her daughter, Megan, aspiring veterinarian, showed off her amazing domestic leopard cat and miniature rabbits. After a few days of rain, the weather turned sunny and gorgeous, with trees turning red, an amazing sunset after the last storm, and images recorded in my memory of pristine farms on rolling hills with Amish horses and buggies pattering past. 


Thursday, October 06, 2011

Glass Breakage!

That’s what I get for bragging on my technique for embedding glass into silver. I’ve never had cracks before, but here they are, right after I opened my big fat mouth.
Sunbird Necklace
Yesterday morning I took photos of the pendant and all was well. As I was constructing the necklace to hang it, I noticed a flash of color from the glass that made me pause. It appeared to be a fine crack starting from the back of the glass and propagating toward the surface.
Sunbird Crack
As the day wore on, the crack propagated, and more formed. There are multiple possible causes.

  1. Perhaps the mounting in this case was too tight. I left a bit of space all around the edges, as usual, so I suspect that’s not the cause.
  2. The back of the pendant was not completely flat, because of deformation caused by the bezel cup on the front. When viewed from the back, there is actually a depression where the cup is attached. I believe it’s more likely that non-uniformity of stresses across the glass could cause the breakage.
  3. Finally, I did some things differently in the enamel on this painting. Specifically, the enamel is much thicker than usual. Because the cracks really appeared to emanate from the back surface of the glass, where the enamel was applied, it makes me think this may really be the issue.
So, you can be sure I will be much more careful in the future, as I try to figure out these factors. Meanwhile, I’ve looked up the tricks of the trade for “healing” cracks in glass. It seems that windshield cracks are often mended by applying a resin to the surface, so I will see if a clear resin coat here will make the cracks less apparent.

Wednesday, October 05, 2011

Completed Freeform Glass and Silver Pendant

Yesterday I assembled the pendant and fired. Today I brushed up the silver and added a dark patina and set the labradorite cabochon. Next, I’ll be adding some special details to the necklace from which the pendant will hang.
sunbrid frontsunbird back
For those near Philadelphia, I believe there is one seat left in my upcoming two-day workshop, October 14-15, where you could learn all the details of the techniques I used in this pendant. It’s easy and fun and offers unlimited possibilities for adding color and personalization to your work. Contact Holly Gage for details.

Monday, October 03, 2011

Freeform Glass & Silver Pendant

As I mentioned, the new pendant has a different design process. The silver box form that holds the glass was formed first.

Then the front of the pendant was textured with tear-aways on both sides, and the hand-sculpted bird and branch were applied over the top. The bezel cup will hold a 10 mm cabochon.
Vickie Hallmark sun bird pendant glass enamel silver clay components
Only after the components were complete and fired did I trace the box form onto glass. After cutting and grinding to a perfect fit, I applied the enamel design to coordinate with the sculpted branch.
After assembly the pendant will be complete. This one called out for a very different necklace design, so I fused some Argentium rings onto the corners for attachments.

Wednesday, September 28, 2011

Developing a Jewelry Design

As I work with glass and silver recently, I'm consciously trying to move the designs forward. Originally I worked with rectangles of glass, since that's the easiest to cut. I combined these with flat mountings at first, then incorporated more decorative elements to go into the third dimension. Last week I finally moved to circles of glass, always harder to cut and grind, especially when they are tiny. I also tried a new setting, using a traditional lentil construction.


This week, I'm going more free form. I've flipped my process around, making the setting first this round, whereas I usually paint and then design a mounting. It allows me a lot more freedom, as I can do the sizing perfectly the first time with no shrinkage calculations. And I can integrate the design of the setting with the painting, as here where the branch design is part silver 3D sculpted on top and painted glass in the background. It reminds me of my quilt designs where I would flip color values at borders for more interest.


I've gone back to drawing in my sketchbook as well. These two drawings show the evolution of the latest pendant design. I started out with a triangular shape with an offset opening, then in the process of drawing in the texture, I realized I should make the silver and glass work together. So I drew a new version incorporating that idea. The setting was cut and refined easily. Now I need to cut the glass and paint it to assemble tomorrow. Stay tuned.

Monday, September 26, 2011

Art Making Requires Stubborness

I just thought that the studio gremlins had retreated after I vanquished them over the last Garden Window glass and silver pendant. My idea for a new mounting seemed much simpler, but didn't prove to be so.

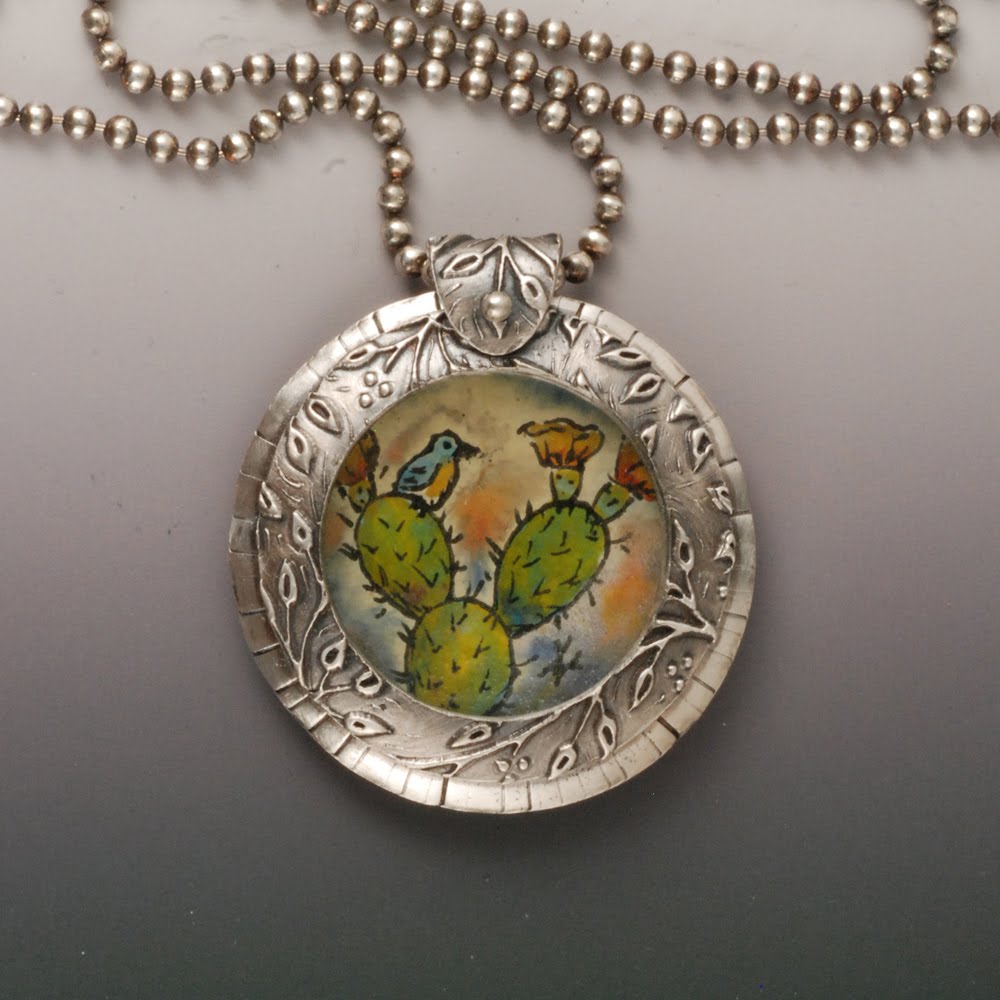
painted vitreous enamel on glass set in silver pendant by Vickie Hallmark

How many issues were there?

  1. Shrinkage. I calculated based on diameter of the glass disc insert, but didn't account for the thickness. 
  2. Breakage. I tossed the front piece onto the floor going out to the kiln. Three pieces from one!
  3. Poor workmanship. One repaired seam held; the other did not.
I made three glass tiles and two silver mounts before finishing one piece. In effect, it's just a lentil with glass in the center. The simplest of the simple, right? 

back of painted vitreous enamel on glass set in silver pendant by Vickie Hallmark

The glass slumped to fit the curve of the back piece, so it has a nice hollow feel to it. Good thing I did not put it in the kiln upside down, or there would have been a fourth item on the list above.

Thank you, studio gremlins, for finally caving and letting the work move forward. I credit them with having a heart as my birthday hour neared.

Tuesday, September 13, 2011

Back to Glass with Silver

I have a stack of enamel-painted glass tiles stashed in a drawer for the day when I make new silver mountings for them. Yesterday I cut and formed the metal clay pieces for a new pendant, and today I did a lot of detailed sculptural details on the front -- nothing fancy, but vines, leaves and bezel cups for cabochons. Tonight as the kiln is clicking away, I'm pondering the options for the glass to mount inside.

hand-painted vitreous enamel on glass

There are three types of enamel paintings here. One tile has just the black tracing. Several are reverse painted on clear glass with a coat of white on the back. The others are painted on the front with different enamels. The reverse paintings on clear are more vibrant, but they tend to react more with silver. Which to choose?

This is the technique I'll be teaching October 14-15 in Pennsylvania. One full day will be playing with the various enamels on glass. And the second day will be constructing a setting for one of the glass tiles. There are still seats available. Holly Gage has more information.

Sunday, September 11, 2011

Overcoming Artistic Obstacles

I'm relieved to put this brooch behind me! I finally decided that the message was to use plain copper for the sandwich, rather than enamel. After I finally removed all the enamel from the etching, I just polished it up and proceeded onto the riveting, which was more trouble than usual as well.


Overall, this piece is not what I envisioned, so I guess it's time to go back to the bench and try again. But at least I can call it finished!


There were some successes. I included my first ever commercial pin finding, sterling silver and nickel. That was easy enough. Usually I make my own findings, but it's good to know how to do both. And I had all that practice at enamel removal. And I'm back in gear with etching.

Art is a dance, forward and back.

Saturday, May 28, 2011

Bird a Week #20 -- Treetop Silver Cuff

While I'm touring around Eastern Europe, I'm not at home working, but I left one new treasure behind that fit the theme.


This cuff was finished the week before I left, at least to the point that I could get it amidst all the packing and last minute minutiae. Early on I planned to add a second layer, either carved and colored faux bone or polymer clay, or maybe even enameled copper. I thought the pop of color would be exciting and the second material would add some much needed strength to an inherently weak silver clay bracelet. Alas, any such treatment will have to wait.

Now it's only a few more days untill I board the return flight. As much as I love traveling, I'm looking forward to being home with my own kitchen (not for long), my own bed and my own studio!

Tuesday, February 22, 2011

Metal Clay Plus Enamel

Slowly I'm making progress on the great backlog of projects on my work table. The most recent piece to reach completion is an enameled pendant titled Aloft.


The base of the pendant is three different layers of smooth and textured metal clay, stacked to form a reservoir for the enamel. The bird and branches were hand-sculpted and added across the enamel opening. Finally the scrollwork and bezel were attached at the bottom. After the enamel was finished, I set the rainbow topaz.

I'm learning a lot about blending colors of enamel (I still need to get my color samples made, but I was too impatient to wait!) and the behavior of the enamel in the kiln. After several rounds of kiln enameling now, I'm thinking I really prefer torch enameling because of the control it offers. Of course, my Little Torch probably doesn't have enough power to attack a piece this large (2" x 1 5/8").

Next on the work table: two layers of silver (one sculpted similarly to this) awaiting a sandwich with enameled copper.

Tuesday, January 25, 2011

Meadowlark Silver Earrings

It's amazing how much time a pair of earrings can take. From the individually textured suns on the backgrounds to hand-formed branches, leaves and birds all carefully placed and reinforced, to firing, polishing, and forming the earwires, there are several hours of work in a pair of Meadowlark earrings.


The first pair I listed on Etsy sold almost immediately (thanks, Kim!), and I was sad to see them go. So I finally made a new pair for myself.

Maybe if I made multiples they wouldn't take so long, but I'm not a production type of person. These are a bit different than the original Meadowlarks.

Sunday, January 23, 2011

Ring a Week 3/52

As I showed earlier in the week, I embedded an enamel-painted glass tile into this fine silver metal clay ring. This was the first time that I used a fine silver ring form from Metal Clay Findings, but it won't be the last. It's a very straightforward, easy way to get a perfectly sized ring. I just wrapped a textured length of clay around the form, mounted it onto the box that holds the glass, then fired. The top window was fired separately, then attached with oil paste and extra decorative syringe clay to the box once the glass was set in, then popped back into the kiln for a second firing.


You might have noticed that this glass tile is not the one I showed before. That one needed a bit of grinding to fit after shrinkage, whereas this one dropped right in. Laziness wins at my house. The nestlings will undoubtedly get their day eventually.


This ring is in the style of my Garden Window pendants


and Birdwatching bracelet.

Wednesday, December 22, 2010

Enameled Copper & Silver Clay Pendant

The holidays are sucking away my studio time, much to my dismay. I'm holding out for some intense days of creating between Christmas and New Year's Day. I did manage to find a few minutes to set the enameled copper disc into its mount with dyed concrete. Then I popped the peridot into the bezel cup. Now, I'm trying to figure out stringing for the neckpiece. Beneath the leaves at the top is a horizontal tube bail, fairly small size, so I need a special neckwire, beads or some fancy wirework to finish the piece.

Monday, September 06, 2010

In a Fog

Why does it always seem that no matter how many supplies I have, there's always something missing?


I purchased these lovely moss aquamarines at Von's in Lafayette after the PMC Guild Conference. Few of the holes are big enough for my 22 gauge wire. I have 28 gauge, which seems too fine, but not 24 or 26. I made do by cutting up a head pin to get a bit of 24 gauge wire, then wrapped with the 28 gauge wire. So I need to order new supplies, for I fear these aren't as secure as I would like. I can't sell something I'm uncertain about. I guess I'll have to wear them myself until new wire arrives.

Then there's the question of missing pieces. I hurried to load a bunch of silver into the kiln before we went out the other evening. While dapping these flowers to dome them (it's easier than shaping them wet), I realized that I'm missing some things. Of course -- there was a whole other pile of parts on a different table that were left out.

Sigh. It does strike me that the aquamarines are blue-green-grey and misty like fog. How appropriate.

Monday, August 30, 2010

Forget about Perfect

Today's choice from Bruce Mau's Incomplete Manifesto of Growth:

2. Forget about good.
Good is a known quantity. Good is what we all agree on. Growth is not necessarily good. Growth is an exploration of unlit recesses that may or may not yield to our research. As long as you stick to good you'll never have real growth.

I'm coupling that with #8 from Bob Parsons' 16 Rules to Live By: Be quick to decide.


I have this perfectionism streak. I get stuck because I can't do things exactly the way I want them. Sometimes I procrastinate because I can't figure out an acceptable solution. When something breaks it can shut me down until it's fixed. I hate that!

Since my oxygen source is out of commission, I need to make do with what I have available. I can't do double-beaded connections, so I'll just have to wire wrap, which is certainly easier. I don't like the look as much, but this is about getting started again, not about being perfect.

It seems like the opportune time to use up old supplies, such as fancy headpins for the flower centers. It took a few minutes of fussing to figure out how to make things hang right, but now I can think about variations on this simple flower earring idea.

It feels so much better to have it finished, rather than still waiting on the equipment repair, which sounds like it will involve shipping to the manufacturer, unless I decide to play scientist and look at it myself. Wonder where I can buy a can of molecular sieve???

P.S. Funny echo in the calculus lecture this morning (we're using Thinkwell for our homeschool calculus, because Ed Berger is an incredibly gifted teacher): If you can't do something, DON'T! Do something easier. See how many parallels there are between science and art?

Sunday, August 29, 2010

Begin Anywhere

Today's choice from Bruce Mau's Incomplete Manifesto of Growth:


9. Begin anywhere.
John Cage tells us that not knowing where to begin is a common form of paralysis. His advice: begin anywhere.


As I work on reorganizing the studio, handling my supplies and tools, I feel the creative mood rising. How can I label drawers for semiprecious gemstones, handling those gorgeous drops of color, and not feel the urge to make something? "But what?" the inner critic asks. Something simple, I think. One thing leads to another. Just begin with the easiest things. 


I decided I'd try to make a lampwork bead. The simplest things, just spacers, or plain bicones for electroforming. For the first time in five months, I turned on my torch. Wouldn't you know it? It seems there's something wrong with my oxygen concentrator. I had that feeling a few weeks ago when I tried to use the Little Torch to do a quick enamel firing, and I couldn't get it to work. After letting the oxycon run for hours, I concede that it probably needs a little help. Tomorrow I'll call about it and see if there's something obvious that I'm missing or if it needs a refurbishment.


After moping around the house for a bit, I decided I'd better make something out of silver clay. That's easy, right? So I whipped out a few small flowers and leaves, similar but smaller (and silver) to the bronze bracelet I made here. The flowers will stack with the leaf hanging below. I'm debating enameling them, but first I'll stay with the easy things and just get them fired.


Can't get much simpler. It's a start. 

Friday, August 13, 2010

Another Glass and Silver Box

I didn't post this one before I left for the PMC conference, because it was finished at the last minute. It's the second version of my glass and silver box. Unfortunately, I didn't quite place the inside rim of the lid properly, so it doesn't fit perfectly. Now I need to make another box for this lid and another lid for this box.


I love all the original drawings on each side, and that there is a favorite quote hidden inside.

It is not only fine feathers that make fine birds. --Aesop


You can see the Master Muse synopsis of the tutorial for this box here.

Sunday, July 25, 2010

Out of the Worktable Mess

Finished jewelry is beginning to emerge from the mess that is my worktable. This is the second aquamarine bracelet, which I like much better than the first I made. I tried something more akin to the concrete pendant stringing at first, incorporating some syringe painted charms, but it didn't lay smoothly on the wrist. So, it's time to rework that one.


I adore this bracelet. It's just lovely, with chunky cut large aquamarines, smaller faceted aquamarine rondels (clear and cloudy), chalcedony rondelles, Bali silver nuggets and flowers, and a couple of Czech glass leaves that just seemed to fit.


One of my keyhole, ball and slot, clasps, set with an aquamarine cab. The only drawback to these gorgeous stones is the expense. Do I really want to part with it or keep it for myself? I guess that will depend on whether the price seems reasonable to some prospective buyer, or not.

Back to the mess that is my space. When I am finished here, I need to rethink my work area. I space just for stringing is needed. Putting all these loose, round objects right in the middle of my metal clay space is a big mistake. How do I get back to carving bronze?

Wednesday, July 21, 2010

More Concrete Plus Copper Enamel

The second pendant made from the over heavy earrings is finally finished, after two rounds of stringing. The first set of fossil coral ovals seemed too heavy, so I had to replace them with the smaller spheres.


This is leftover etched copper with torch-fired enamel, set into a fine silver clay box, filled with butterscotch concrete. The stones are fossil coral, freshwater pearls, and Swarovski crystals.


Whew! Now, are the cabochons I'm waiting for in my mailbox, I hope? I have some bracelet clasps here waiting.