Showing posts with label designing jewelry. Show all posts

Thursday, August 01, 2013

Silver Isn't Always Silver - Have a Little Black Patina with Your Jewelry

One of the trends for silver jewelry I've noticed over the last year or two is silver that's not silver: the rise of deliberate black patina. Since silver tarnishes from exposure to sulfur (not oxygen!) in the environment, regular cleaning is a necessity to keep that bright silver color. So we buff with a cloth, or dip into chemicals, or, best of all, prevent the tarnishing by storing in protective covering. The overall black patina converts a drawback into a desirable trait, starting off with the black surface as a design element.

Flora bracelet
©2013 Vickie Hallmark
sterling silver, dark patina
Of course details can be harder to see if the silver is all uniformly black. Typically silver jewelry is given a black patina to fill the lower areas in any texture, then the patina is removed from the raised surface to highlight all the detail. The surfaces may be bright and shiny or brushed and matte, but still black is only an accent.

Flora bracelet
©2013 Vickie Hallmark
sterling silver, light matte patina

I decided to experiment with my new Flora bracelet, just to see how it looked with various finishes. So you see it here in black, matte and shiny versions. I posted the first two on Facebook with a poll to see which was most popular, and the light version won by a landslide. Still, there were a number of friends who preferred the dark version.

Flora bracelet
©2013 Vickie Hallmark
sterling silver, light shiny patina

Which is your favorite?

Thursday, July 25, 2013

Variations on a Theme

Today I have three new variations on an earring theme. I've had a bad cold, so the most work in the studio that I could muster was fusing together components with some heavy wire to make these new dangles. Available now in my Etsy shop.
Rock Rose Trapeze earrings
©2013 Vickie Hallmark
sterling silver
The first variation uses medium rock roses with double small leaves on either side.

Rock Rose Long Drrop earrings
©2013 Vickie Hallmark
sterling silver
The second variation has  single large rock roses with medium leaves below. The heavy wires in both cases are about the same length, but more curved in these.
Rock Rose Swing earrings
©2013 Vickie Hallmark
sterling silver
The final version has double small rock roses with medium leaves below and a couple of berries. 

All in all, a fun set that were easy to fuse together because of the properties of Argentium sterling silver.


Saturday, July 20, 2013

Similar Earrings, Different Paths

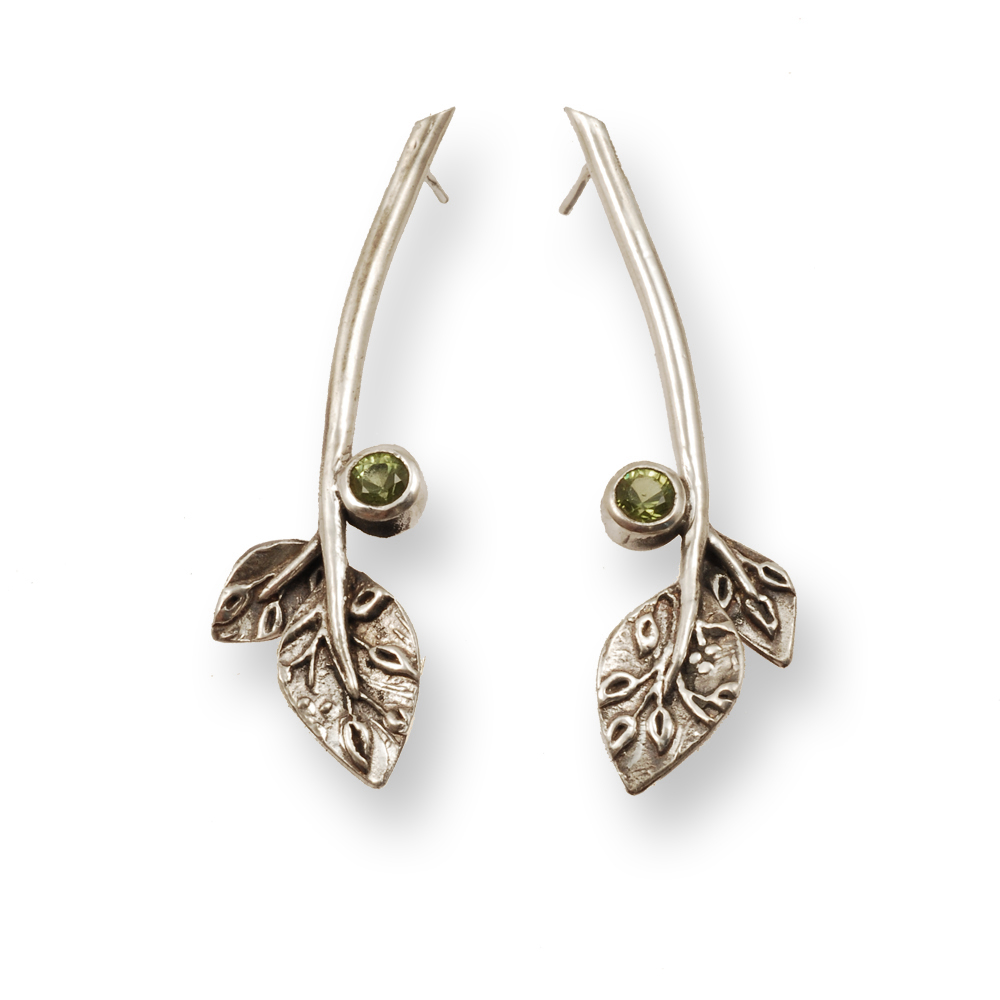
This morning I finished the Periodot Leaf Bud earrings that have been sitting on my bench for literally months.

Peridot Leaf Bud earrings
©2013 Vickie Hallmark
sterling silver & peridot

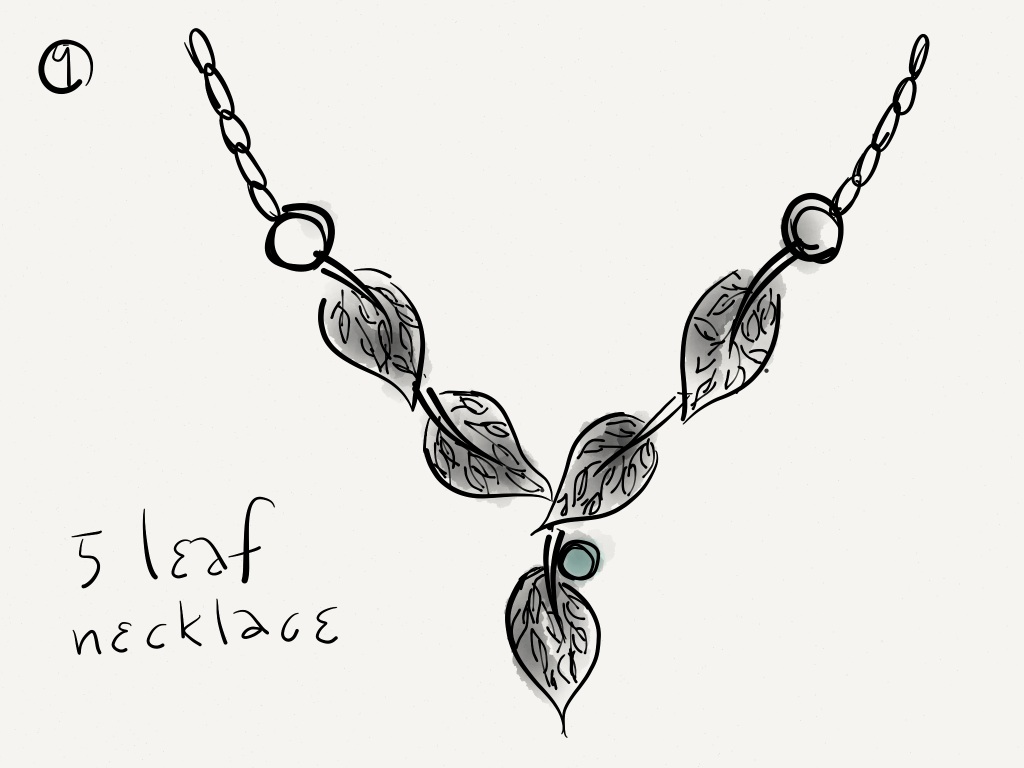
These earrings started off as modifications of sketches I made on my iPad when I was exploring this new leaf series.


All these designs incorporate the leaf-on-leaf design from my early double leaf earrings, a favorite of mine. Early in the process I drew single leaf earrings with tube set stones, since I'm really drawn to more color in my work. 


Then I drew double leaf earrings with stone "buds." The leaves are all small and similar sized.


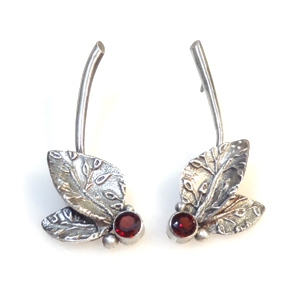
Then I got the idea to mix up the leaf sizes, which led to the Garnet Leaf Earrings, made at about the same time as the Peridot Leaf Bud earrings. 
Garnet Leaf earrings
©2013 Vickie Hallmark
sterling silver & almandine garnet
Those earrings went through the convoluted casting learning process, while the peridot version languished on my bench waiting for their own attention. 

Since green is my favorite color and a staple in my wardrobe, these may become my new "go to" for regular wear.


Wednesday, July 10, 2013

From Drawing to Metal

A few weeks ago, I wrote about my design process for a custom ring. That post detailed how I start with an idea, develop the drawings, and convert them to texture plates. Finally, I'm happy to report that the design has been reduced to metal.

Canary Ring
sterling silver
©2013 Vickie Hallmark
I used the original texture plate to impress the design into sterling silver clay, which was dried over a domed form to give the bowl shape. Then I hand-fabricated the ring shank from Argentium sterling silver. I felt it needed to be wide enough to support the one inch diameter top, but wanted it to be comfortable to wear, so I cut the band five millimeters wide, but filed a taper on both sides to reduce the edge against the palm to just over two millimeters. In the next photo, you can see that I also used my leaf vine texture to simultaneously pattern the back of the bowl.

Canary Ring, back
sterling silver
©2013 Vickie Hallmark

The Argentium band was secured to the unfired clay form via extra clay, including my usual small oval hallmark with my swallow, initial logo, and .925 quality mark. Then the entire ring underwent the two stage firing process required for sterling clay. First, the ring was supported in vermiculite while slowly heating to 1000ºF and holding for thirty minutes to burn out the organic binders that glue the tiny metal particles together in the raw clay. During this stage, the Argentium darkened somewhat, but didn't develop fire scale like regular sterling would. Then the ring was buried in carbon and refired at 1500ºF for two hours to allow the metal particles to move to compact and sinter the metal into a solid piece of sterling silver. After cooling, the entire ring had a very slight golden color to it, which was quickly polished away.

Canary Ring
sterling silver
©2013 Vickie Hallmark

I think this is my new favorite ring!!

Thursday, July 04, 2013

A Flock of Bird Components for My Jewelry

I'm known for my bird themed jewelry, where each bird is hand-formed individually just as nature would do it. Unfortunately, there's a lot of work involved in sculpting a half inch bird by hand from a pea sized lump of metal clay. That limits the amount of jewelry that I can produce. Many people over the years have suggested that I mold my birds and reproduce them. I've always resisted. Until now.

bird casting trees

Finally, I've realized that I sometimes procrastinate on delicate, fussy work (who, me?!) such as birds. While it's lovely to make exactly the right birds for each piece of jewelry, it is frustrating to have to spend time getting in the flow to be able to easily get the expression that I want for a bird. I did mold a couple of birds and shoot multiple waxes of them in one of my casting classes, which I then assembled into bird trees to mold again later in class. That enables me to easily cast multiples of each of these two.

Bird Teardrop earrings
©2013 Vickie Hallmark

But then I've gone to use them in jewelry and gotten frustrated that I only have a couple of different birds, two different sizes and facing the same direction. I like my earrings to be mirrored, with the birds facing both directions. I've come to a realization.

Spring Flock necklace
©2012 Vickie Hallmark

I need a flock! Big birds and little birds. Perching birds and flying birds. Recognizable wrens and cardinals and hummers, as well as generic birds. Birds from the back and front and side. Matched, mirrored pairs of birds and single birds. Upright birds and horizontal birds. Left wingers and right wingers. A variety, like I would use on my Flock necklaces.
component bird pair

So I've committed time to sitting down with clay and working on just that - a flock of birds to mold and cast so that I always have exactly the bird in the hand that I need. It's time consuming prep, but  of course repetitive work builds skill and the birds get better as I do more. And hopefully (right!), procrastination will recede.

Monday, June 17, 2013

Coordinating a Jewelry Line

My first jewelry love is earrings. When I was sixteen I finally persuaded my mother to allow me to pierce my ears. Her own experience involved ice and a threaded needle in the hands of friend, so she wanted to spare me some agony. For some inexplicable reason, we were convinced that "self-piercing" earrings would be better. Over the course of many grueling weeks, those sharpened 14k gold posts bored through my earlobes. I swabbed with alcohol religiously to fight the infection issues of a long open wound, and refused to give up because I wanted to wear earrings so desperately. Two years later on my sister's sixteenth birthday, she got to have the studs shot through her ears instantly. Older sisters really do blaze the trail. I still have the 1/2" tormentor rings in my jewelry box.

3 Leaf Pendant
©2013 Vickie Hallmark
Over the course of the last few weeks, I've experimented heavily with my cast components, mostly working on earrings. I make things I would wear myself, and earrings are the item I always collect. Other people have different preferences. Some wouldn't leave the house without a necklace or pendant of some type. Some always have an armful of bracelets. Some love statement rings. To make my jewelry appeal to others, I need to make other jewelry besides just earrings. So this week is dedicated to working on jewelry other than earrings, inspired by the earrings I've made recently.

Oh, and maybe an occasional pair of earrings, just because I can't help myself.


Thursday, June 13, 2013

Revisiting a Previous Design

One of the best things about working in a series is that I don't have to totally recreate a project. Say I need a new brooch, in the style of my Bird Song brooch which I adore (but which has some issues due to less than perfect workmanship).

Bird Song brooch
©2012 Vickie Hallmark
I don't want to simply remake the brooch, which would be impossible anyway since that was a special stone. I want to make a piece with the intention of it being even better. What would I improve?


Well, first I need a focal stone. This elongated pear citrine called my name during the last few minutes of shopping the vendors at SNAG. I listen when purchases speak to me, as over the years I've learned that my subconscious knows what I need before I do. It might sit for years, or it might get used immediately, depending on how long it takes me to execute the work sitting in my head. How's that for shopping justification? ;-) If I look at my Book of Attractions, there are many pages of black and gold themed work, so citrine is a good choice for a heavily oxidized Night series piece. I also happen to have a collection of round citrines hanging around, if I decide to tube set some smaller stones, as I did on the original Bird Song (those were white CZs). The original brooch used gold ball accents, but my lack of heat control led me to remove them. I'm a lot more experienced now, so I could try that again.  Ah...the plan is shaping up.
night brooch sketch 1
©2013 Vickie Hallmark
night brooch sketch 2
©2013 Vickie Hallmark
night brooch sketch 3
©2013 Vickie Hallmark
Now, I need to brainstorm layouts. Is there a different shape, a better shape, some other accents? Perhaps I should sketch a few options. These are three from a yellow pad late at night.

night brooch sketch 4
©2013 Vickie Hallmark
night brooch sketch 5
©2013 Vickie Hallmark
These are from Paper by 53, my favorite iPad app, which lets me add color easily. So, how about some feedback here - which sketch is your favorite? (I already know which one appeals to me!)

Wednesday, June 12, 2013

Designing Jewelry - Same Components, Different Combinations

Over the last weeks I've made multiple earrings that each used the leaf-on-leaf cast components. Each pair is totally different than the others, but yet clearly related because of the consistent use of the leaf-on-leaf element.

3 Leaf Drop earrings
©2013 Vickie Hallmark
I feel that I could go on like this for ages - rearranging the components into slightly different groupings, exploring the possibilities. The pair above has a medium and small double leaf stud at the top, with berries and a ring to attach the larger leaf drop. 
Open Leaf Drop earrings
©2013 Vickie Hallmark

This pair has the same double leaf stud at the top, only done with large and medium leaves. The drop on it is much longer, an open wire leaf shape with a medium leaf-on-leaf at the bottom. Someone suggested it might look more balanced if flipped vertically, so there's another option to make.

Twig earrings
The Twig earrings have a short stem, medium and small leaf-on-leaves and two large berries each.


These have the long stems, leaves pointing up instead of down, and tube set garnets. 

Of course, this opens up an entire collection of ideas: leaves up or down, stems short or long, different sizes of leaves, stones, berries, ... 
Beaded Rock Rose Earrings

And then I might even throw in another component and add a flower on top of the leaves. Or berries changed to beads along the stem. 

The limitation of a set of components to work with actually isn't a limitation at all -- it's an invitation to be creative with a limited set of options, to get the most from those pieces by exploring the myriad ways to combine them. 


Thursday, June 06, 2013

Momentum at the Bench

Working more regularly at the bench produces momentum. New ideas pop up, but old projects resurface as well. Suddenly the issue that stymied me before may disappear as a solution presents itself.

Full Moon Pendant
©2013 Vickie Hallmark
Argentium sterling silver + fine silver
The original bail design for this pendant didn't work the way I wanted, so I'd removed it and cast the piece aside. Today, one of the many bits lying on the bench surface caught my eye - a simple slice of tubing, that with a couple of strokes of a file could be made to fit nicely along the edge of the domed full moon pendant.

It took a couple of tries to figure out how to hold everything securely while soldering the tube in place, but eventually I remembered enough tricks: holding the pendant vertically with a third hand, using super glue to temporarily hold the bail exactly where I wanted it, and placing a tripod on top for light pressure to keep the bail steady while the solder melted.

I like it hanging on a simple black rubber cord. Now I just need to work on the coordinating clasp.

Wednesday, June 05, 2013

From Sketches to Metal - Scale and Composition

One of the reasons for making components in various sizes is the range of options that gives for composition.


This sketch utilizes leaves of all similar sizes. My largest leaf-on-leaf, approximately 3/4" long, can work well for this design. I haven't made this one yet, as I have yet to cast a large number of stems or to work out how the connections will be made - fixed or mobile.


More delicate earrings like these studs and small drops need a smaller scale of leaf.

The first time I made leaf earrings, the design which this entire series is based upon, I used the larger leaves stacked one over the other.


When I started to make the double leaf earrings with the stones, two large leaves together overwhelmed the 5 mm stones, so I made a medium leaf. 


You can see that the design doesn't quite match the drawing above, as I moved the components around when they were laid out.  


Here's another earring drawing with the beads along the stems, which I really liked, so I started experimenting with compositions including the beads, which are simply lengths of wire heated until they ball up and then fused into place. The rock rose flowers sitting on the bench got pulled in as well.


One thing leads to another - that's the whole point of working in a series. It's impossible not to have new ideas creep in as the work proceeds. 

Tuesday, June 04, 2013

First Component Jewelry Pieces

To show the range of the idea of components, I whipped up three pairs of earrings one day.


A simple variation involved a pair of small leaves and a small rock rose, with plain wires fused in places. Very simple and fast, with many possible variations - length of wire, number of leaves and flowers, positions of everything along the wire, stones or not... I can see that having the components makes these much quicker to make, while maintaining the individuality of handmade.  It's a way to make simpler earrings at a lower price point.


These more complex earrings take a lot more metal, but the level of the design is clearly much higher. I like the heavy stems better than the plain wires on the first pair. These are a higher price point.


The simplest possible design is just adding a post to make flower or leaf studs, as shown in the previous post.


Thursday, May 30, 2013

Designing Jewelry with Components

Piles of cast components are rather exciting in and of themselves.

cast leaf components, 3 sizes

Suddenly the entire idea of breaking designs into components seems so obvious. Why didn't I do this before? Not only did I mold leaves in three sizes, but I cast my simple rock rose in three sizes as well.

cast rock rose components, 3 sizes

To work with the drawings I made before, I must combine these components in various ways. 

leaf design #9

For many of the designs I need "stems," so I formed two different lengths in sterling clay, fired, finished, and molded those as well, again allowing for extra shrinkage. 

long and short stem models, after molding

Once I have quantities of these components to work with, the fun begins. I dump them out on my work surface and start experimenting with different arrangements.

experimenting with designs from components
When I find something I like, the components are permanently combined. Because all the components were cast in Argentium sterling, I simply lay them out as desired, with good overlap, and fuse them together.

first fused design from cast Argentium components


Wednesday, May 29, 2013

From Sketches to Metal - Making Multiples

Once the sketches started mounting up, it became clear that the recurrent leaf-on-leaf could be a component. Casting as a way to make multiples is something I've considered for some time, so I finally took two weeks worth of classes at Jewelry Studies International this spring to learn the fine points of making models and molds for casting.


The mold making process involves shrinkage, so I made master models of my leaf components that were larger and thicker than I'd like for the finished jewelry. For metal clay artists, dealing with shrinkage is a normal part of the process, so this is just a double dose of that planning.


I made four pieces in sterling metal clay so there would be some variation, fired and finished, then attached them to a metal sprue to act as the conduit in the casting process. (The photo shows the models and sprue after the mold was made, which causes discoloration.) I repeated the process to get large, medium and small leaf-on-leaves.


Here's the final mold for the large leaves, used to make injection waxes for the lost wax casting process. While it's fairly quick to make these leaves by hand using metal clay, even refinement of metal clay takes a lot of time. It's faster to make a set of models, finish them nicely, mold and shoot waxes, attach them to a wax tree, and then cast an entire flask of leaves. Finishing after casting is fairly quick - clipping the leaves off the sprues and some quick filing and sanding at the attachment points before assembly.