Showing posts with label drawings. Show all posts

Saturday, June 01, 2013

Designing Texture Plates for Metal Clay from Original Drawings

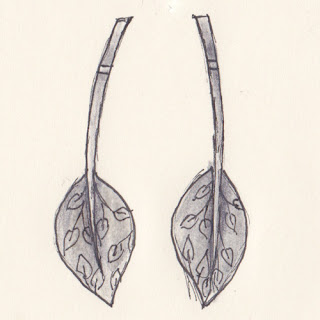
I'm working on a custom order for some bird themed jewelry. I love working with customers to make their jewelry personal and one-of-a-kind. I'm waiting on feedback for the drawing shown here.


Since I've had some inquiries about how I convert my original drawings into texture plates, I thought I'd detail the process as I work it through here.

First I started with a request for two canaries. I did a Google image search and settled on this photograph as a basis for my design.

three red(!) canaries

Working freehand, I did a rough sketch of the rightmost two birds, but tracing would be an easier option.

sketch of two canaries

This sketch was then reduced on the copier to fit inside a roughly two inch diameter circle to work on the fill pattern and background. 

canaries filled with pattern

Once I had a fill pattern that felt acceptable, I made multiple copies and tried different patterns for the background, finally settling on this one with the canary names.

background for canaries

The rough design was then scanned into the computer and cleaned up in Photoshop, changing everything to nice crisp black and white and removing the rough circle where I traced around a roll of tape.

circle removed from canary sketch

Then I copied out the circular area and set it into a dark background for the final design. 

final canary texture 


Once modified and finally approved, I'll invert the black/white to get the high/low right for the final texture plate.


Monday, February 04, 2013

Sketching Designs on My iPad

I'm a sketchbook person. I do my best design work while traveling, where I have fewer distractions. In past years I've carried Moleskine sketchbooks, pens and watercolor pencils. Recently, I've been experimenting with utilizing the iPad that always accompanies me.


Although I've tried a variety of drawing and painting apps, such as Brushes, Sketchbook Express, and Penultimate (which I prefer for handwritten notes), my favorite by far for sketching is Paper by Fifty Three. I'm not alone evidently, as the app won the App of the Year award in 2012.  I love the simplicity of it, but really the look is the thing. It's so easy to get the watercolor look that I'm used to doing by hand.


When you open the app, you see a collection of sketchbooks, which closely resemble those Moleskine notebooks in my collection, but with the option to customize the covers. Each one opens up, looking just like the physical thing, and allows you to flip through the pages. Once you find a page to work on, you can go to full screen and begin working with the fountain pen and erase tools. To get more flexibility, you can purchase additional inexpensive tools, including a pencil, pen, marker, and paintbrush, each of which does pretty much what it sounds like it should. The easy undo/redo is a big bonus. The paintbrush is still undergoing some evolution to get more lifelike control (a color mixer tool was just added), but still I like it. I find that a Sensu capacitive brush/stylus gives me the best control.


I don't know that this will ever totally replace my paper sketchbooks, but it certainly is lighter and easier to tote with me while traveling. And it's even easier to upload the images. No scanning required.


Monday, July 30, 2012

Sketchbook Designs for New Jewelry

New designs are in the works. It's interesting that my approach to designing jewelry is a bit different than my approach to designing quilts. With quilts, I very much design on the fly, usually starting with a small central piece and then letting the piece get larger and larger by adding more around the edges, or working in a grid of smaller pieces. Perhaps because jewelry just can't be seven feet square, I don't 'grow' it in a similar way. Most of the time I actually draw designs in my sketchbook and then make a piece quite similar to the concept. Yes, things change as a I problem solve, but mostly I have a pretty good idea how the piece is going to come out.


This new design is returning to my cache of enamels. I adored my workshop more than a year ago with Charity Hall, where I learned new enamel techniques that allowed me to layer color and design to build up tiny compositions very like my journal pages. I actually made a piece from fine silver clay to mount one of my favorite enamels from the class, but had some non-symmetrical shrinkage that caused the piece to come out of the kiln substantially not round. That reminded me why I usually make my bezels in metal clay first and then dap the copper to fit before I do the enameling. Yes, I could get better at planning for shrinkage for metal clay, but Argentium seems like the perfect fix. I'll build the setting for the enamel with sheet and wire, and attach it to the larger piece with a granulation border.

I think the design reminds me of echinacea flowers, so I may have to make a new flower enamel to insert. But perhaps it's a perfect way to merge the flowers I've been playing with lately with my trademark birds.

Sunday, July 01, 2012

New Designs: Fuchsias

I'm revisiting fuchsia flowers, with which I have a periodic history. Everytime I see them in the nursery here in the spring, I have flashbacks to a patio full of them when we lived in California. Luckily, I snap out of it and remind myself that I now live under the Texas death star.

fuchsia earring sketches
 Yesterday, while drawing up some new simpler earring designs, I thought that maybe fuchsias would be fun and possibly easier to make than birds. Notice the bud shape on the pair of earrings to the right -- I think that's where the idea came from. My birds are hand-formed, and they just keep getting more and more detailed. To make some lower cost earrings, I need to cut my labor down.

fuchsia flowers & leave (& 1 bud)
hand formed from fine silver clay
waiting to be cleaned and fired
Fuchsias were easier to do that I thought they might be, after I ran through several experiments on  how to make the sepals and petals. Today I will make the stamens, fire the flowers, and then try fusing the fine silver onto the argentium bases.

Monday, January 16, 2012

FAM Challenge #2: The Design Phase

The view from my sketchbook: a new earring design with NO birds. Currently in process in sterling clay.

Saturday, January 14, 2012

Making Original Drawings into Textures for Metal Clay

It's time to update my textures that I use repeatedly for my jewelry, so I've been working in the sketchbook.

My process is as follows:
  1. Draw until I get a design that appeals to me.
  2. Scan the image and upload it to Photoshop.
  3. Convert to black and white, maximize contrast and clean up all edges.
  4. Upload and order an unmounted rubber stamp of my original work.

Wednesday, September 28, 2011

Developing a Jewelry Design

As I work with glass and silver recently, I'm consciously trying to move the designs forward. Originally I worked with rectangles of glass, since that's the easiest to cut. I combined these with flat mountings at first, then incorporated more decorative elements to go into the third dimension. Last week I finally moved to circles of glass, always harder to cut and grind, especially when they are tiny. I also tried a new setting, using a traditional lentil construction.


This week, I'm going more free form. I've flipped my process around, making the setting first this round, whereas I usually paint and then design a mounting. It allows me a lot more freedom, as I can do the sizing perfectly the first time with no shrinkage calculations. And I can integrate the design of the setting with the painting, as here where the branch design is part silver 3D sculpted on top and painted glass in the background. It reminds me of my quilt designs where I would flip color values at borders for more interest.


I've gone back to drawing in my sketchbook as well. These two drawings show the evolution of the latest pendant design. I started out with a triangular shape with an offset opening, then in the process of drawing in the texture, I realized I should make the silver and glass work together. So I drew a new version incorporating that idea. The setting was cut and refined easily. Now I need to cut the glass and paint it to assemble tomorrow. Stay tuned.

Sunday, September 04, 2011

How to Personalize Your Design Sketchbook

I've blogged many times about how I use my sketchbooks to work out design ideas. More and more frequently now, I actually reduce sketches to practice, with very close resemblance. For example, I blogged about the long delay while I learned to make the beads I drew in my sketchbook in just the way I'd visualized them here. My motto is "if I can draw it, I can build it." My choice of sketchbook to keep in my bag has heretofore been a large (5"x8.25") Moleskine plain paper sketchbook. I've gone through a stack of them, and more recently I have turned to the Volant soft cover notebooks that come in fun colors.


A few weeks ago I was thrilled to receive an announcement from Blurb that they were offering a new blank paper notebook option. As soon as I found a few free moments, I whipped together a sketchbook with illustrations from my Bird Journal and ordered copies in color and black-&-white to inspect. Now I'll be giving them a whirl as new tote-around sketchbooks.

Want a notebook with your own personal artwork on the front? I can imagine lots of possible uses besides sketching -- a log of accomplishments, a 'to-do' list file, a guest book for studio or booth, ... Just follow my easy directions below. My design is also available in my Etsy shop.


Design Your Own Notebook/Sketchbook:

  1. Download BookSmart bookmaking software onto your computer from Blurb.com .
  2. Start BookSmart and select Notebook, a 6" x 9" format book with full-color covers and blank pages. Click Continue.
  3. Choose Lined, Grid or Blank pages, then click Continue.
  4. Upload images from your computer or photo sites (you can add more later). The optimal cover image sizes are 1684 x 2584. I used Photoshop to add borders above and below to my previously square images. Click Continue for the guided step-by-step construction.
  5. Drag photos from the 'My Photo's pane on the left side to the target cover or page.  A slider bar at the bottom lets you scroll through the 100 pages. Just click on the page of choice to edit. This notebook template is set up for photo insertion every sixth page, but you can just leave the entire thing black inside if you prefer. I just drug in one of my high resolution square images to each of the templated image pages. These can be printed later in either color or black&white.
  6. Add text (title and author, for example). I did my text when I added the borders in Photoshop, but it's easy to add here.
  7. Make sure you add the back cover and a copyright statement somewhere inside. 
  8. At any point, click "Preview Book" to see what the book will look like. Beware images at too low resolution -- a yellow warning sign will appear. Return to make changes by clicking "Edit Book."
  9. When the book is finished to your liking, from the Preview, click "Order Book." 
  10. Fill out information about the book, choosing whether it's private or public, add an author bio, set up  preview pricing info, and order from the Blurb link. B/W notebooks are obviously much less expensive than color.  That's all there is to it!

Thursday, August 04, 2011

Using Sketchbooks: Making a Vision Come True

One of the things I love most about my ever present sketchbook is that it preserves ideas for later inspiration. Sometimes bringing a vision to fruition can take a while.


I first drew the treetop beads on October 15, 2009, almost two years ago. I envisioned a necklace of various soft colors with unifying silver glass stringer. Of course, I found that I couldn't make those beads, because the process of reducing the silver glass stringer would produce metal fumes that would change the color of the base bead. I struggled for ages, trying every color I could reach. Sky blue and copper green were less susceptible to the fuming, while a few other colors transmuted to something tolerable, but most just turned sickly brown.


Finally, after probably a hundred beads, I stumbled upon a way to finally make the beads of my vision. And the necklace looks remarkably like what I drew! I didn't take a very good photo, but there is a bird on every bead (at least one). I sold many of the best treetop beads during the ISGB Gathering Bead Bazaar on Saturday,  so I need to make a few more to put the necklace together in the way I desire. Colors available: goldenrod, apricot, peach, orchid, lilac, gray, kiwi, lime, sky.

I think I'll go revisit my sketchbook for more good ideas long past due.

Friday, June 03, 2011

Drawing from My TravelsL Designs for Bronze Clay

I've decided that I do some of my best design work while traveling, by plane or train. Why is that? Perhaps the brain has been freed up by the journey, and the hidden artist within can bubble up. These excerpts from my travel journal were made on the train from Prague to Vienna.


Working away got me to thinking about some of the sketches I made on the last Europe trip, but haven't yet translated to reality. In particular, I'm quite in love with the drawings that involve carving, which reminds me that I haven't pursued that like I thought I would. I seem to have been in a silver rut, avoiding bronze or copper clay, even though I have a large stash I should use. I think I'm adverse to what is currently popular, so if everyone is doing bronze, I tend to stay away. But this tree is really calling to me.

I think I'll just run off to condition a pack of clay and cut out a few pieces to try some carving.

Thursday, February 10, 2011

Bird a Week #6

This week I'm feeling inspired, I guess. I have a glass workshop tomorrow with the inimitable Sara Sally LaGrand, and I'm also headed out of town on Sunday and Monday for a quick Valentine's getaway with my dear husband. Consequently I'm finishing up all sorts of work early to make room in my schedule.


I chose one of the unfinished two-page spreads in my journal, where the spirals and quail were in place, but everything else needed completion. I searched through my list of bird quotations for one that fit my mood. Vision seems to be the appropriate concept, as I've been interviewing contractors for an upcoming kitchen remodel.

What started out as granite countertops and new backsplash soon morphed into new, non-builder grade appliances and then replacements for the cheap white thermofoil cabinets. Why replace everything else and leave the lowest of the low behind? The vinyl coating several years ago went completely yellow and received a coat of paint to restore the white. Now the paint has worn through around the knobs on high use doors and the vinyl coating is starting to release on edges. It costs half as much to sand these particle board constructions down and repaint as it does to get brand new, real wood cabinets designed to my specifications!

Lots of work though to make decisions, the first of which is a contractor. Who do I choose? The little guy who really wants the job and has already gone out of his way to bring his carpenter subcontractor out to discuss ideas with me? Or the big guy who is doing my neighbor's remodel (coming up on five weeks of work and several more to go) and tells me I should hire him because they are big, have their own in-house people (no subcontractors) and the everyone including the major uses them? Dare I get one more bid or will that just confuse the issue? So many questions keeping me up at night.

At any rate, the latest journal entry is finished. See all the other pages on my Flickr page (link to the right) and visit the other Bird a Week participants here:

Thursday, January 06, 2011

Custom iPad Skin

It came! After a bit of fussing to get all the bubbles out (the larger format is more difficult), I have the new skin affixed to my iPad. Now I can spot mine in a crowd!


Want your own custom skin? I used Photoshop Elements to design mine, adding a border from a separate bird journal page at the bottom, since the square format didn't fit my iPad. I uploaded the file to SkinIt, where it was printed and shipped within days. My only advice is to add a bit more of a border around the perimenter for misalignment. I have a tiny sliver of white at the bottom of the skin, because it printed shifted up slightly. Well, maybe check saturation better, as well, as the text is a bit hard to read on this print due to low contrast, but I think I like it anyway.

Wednesday, January 05, 2011

A New Year and a New iPhone Skin

I'm racing to get ahead of the schedule for this spring so that I can find studio time and blogging time. Unfortunately, neither happened over the holidays, although I had plenty of quality time with family and friends.


One rare fun moment of creation involved creating an iPhone skin for my dear friend Lora Hart, who was so flattering as to ask for one with my artwork on it. This pink should set off her delicious red hair.

Coming soon, I hope, the skin I ordered for my new, surprise iPad. Yes, if you are wondering, I love the thing, although I don't have it doing everything I desire yet. Still, it's an amazing device to me.

Wednesday, November 24, 2010

Custom iPhone Skin

I wasted half an hour last week playing around with one of my bird journal scenes as a skin for my iPhone. The square format didn't really work, so I pasted on a fragment from another page at the top. I uploaded it to SkinIt, moved it around in their program until it fit the way I wanted, and then they printed and shipped it the next day. Fun, no?


 Of course, I set this same image as my wallpaper as well. Now it's truly one of a kind.

Sunday, October 31, 2010

To Enamel or Not?

I'm trying to decide if these projects are destined to be enameled. It influences my construction. Do I build a perimeter to contain and protect the glass enamel? Or am I free of the wall constraint?


Even when I sketch, I never know how the piece will turn out until it's finally done. There are so many decisions to make along the way.

Saturday, October 30, 2010

More Sketches for New Projects

Hurray for the weekend! I'm hoping to make some progress on the many projects in my head and sketchbook waiting for some active attention.


Friday, October 29, 2010

Monday, September 13, 2010

Copper Enamel Settings

It was a busy weekend, so I didn't make much progress on the copper enameling. I did think on my silver settings at least. I'm debating brooch vs. pendant, bail styles, and how ornate to let these little rascals get.

This one is sitting on my worktable, without its top, while I debate the bail construction.

Sunday, July 04, 2010

More Zentangle Doodling

Fourth of July holiday beckons and I haven't progressed a lot on everything piled on my work table. I decided to target a bunch of enameled earrings, both because I can finally get out to the torch again and because those might be items of interest at Purdue during the upcoming PMC Guild Conference.

I signed up months ago for a "show and sell" table at the conference. Of course, there's not a lot to show or sell due to my distractions with healing. But, I did sit down and think hard about what people have seemed most interested in, and the enamel earrings rated fairly high. So now I see how economically, time wise, I can make them. Of course, I hate to just mass produce them, so they all have to be a bit different. New ideas keep popping.


Amongst the new ideas, I want to turn more doodles into texture plates. Here's another. I kept this one very simple after I realized the previous intricate 3" diameter Zentangle wouldn't reduce down to a 1" charm very well. I keep playing with this one, trying out new things.


The way I make these is a bit crazy. I start off doodling by hand, but then I scan them into Photoshop to clean up and try out variations. Here's the original, with a spiral belly on the bird that didn't quite work for me.


And here's the latest iteration, with the sun changed to dark with texture. I like working on them on the computer, because nothing is lost. I always have the option to revert to the original.

Friday, July 02, 2010

Zentangles

As a treat, I bought myself a bunch of Zentangle books. Zentangle is a specific type of structured doodling which has suddenly become all the rage. I became aware of Zentangle several years ago, taking a bunch of cut paper squares with me on a vacation to facilitate beach relaxation. I couldn't stick with the format, but it was still fun to have that restricted space and a starting point.

Today I rewarded myself with some lazy time while the kiln cooked. I looked at three Zentangle books. The first two, Zentangle Basics and Zentangle 2, seem to be pretty basic, aimed at educators who want to incorporate doodling into their curriculum. It was interesting just to see what type of fill patterns were being used. The newest book, Totally Tangled, was a bit more intriguing. The author, Sandy Bartholomew, breaks away from the small square format and doodles everything. I found her blog, BEEZ in the Belfry, to be very fun. I am particularly taken with this apron.


So I drew a circle in pencil on one of my leftover paper squares, and thought about what I was supposed to do next. Of course, I couldn't follow the rules, so my usual bird and branch went into the circle. Then I worked on a fill pattern to use up some of the remaining white space. I liked it enough to scan it into Photoshop, clean up the image and save it for a future photopolymer plate or rubber stamp. A perfect project for a gray, rainy day!